
Have you encountered the error “Failed to initialize graphics device” while playing games on a Windows PC? Many gamers have been complaining about issues like the Graphics system could not be initialized. Here, we have constructed a guide with all the possible methods to fix this issue and initialize the graphics mode of your display system. Let us get started.
How To Fix the “Failed To Initialize Graphics Device” Error
Method 1: Launch The Game In Compatibility Mode
The compatibility mode helps gamers lower the game’s requirements and resolves the issue. Here are the steps:
Step 1: Right-click on the main game executable and choose Properties.
Step 2: Click on the Compatibility tab, and under the Compatibility Mode dropdown, select an operating system version that came before your current OS.

Step 4: Click on Apply, followed by OK.
Step 5: Open the game to check if the issue has been resolved.
Method 2: Modify Display Resolution
You can change the display resolution if the compatibility mode options do not work.
Step 1: Right-click on any space on your desktop and choose Display Settings.

Step 2: Click the Display Resolution dropdown and lower it to the current selected resolution.

Step 3: Launch your game. If you are still facing the “Unable to Initialize Graphics System” error, try lowering the resolution one more time and checking.
Method 3: Update Windows
Updating Windows has helped many gamers fix the “Could Not Initialize Graphics System.” Here are the steps to update Windows:
Step 1: Press the Windows + S keys to open the Search box.
Step 2: Type “Check For Updates” and select the relevant result under best match.

Step 3: Click on the Check For Updates button.

Step 4: After identifying the updates, click on the Download and Install button to update your PC.
Step 5: Next, click the Advanced Options followed by Optional Updates.

Step 6: Look for the Driver updates section. If you find any pending updates, check the boxes next to them and click the Download and Install button.

Step 7: After completing all the updates, reboot your computer.
Method 4: Update Graphics Drivers
The final step to resolve the error is to update the Graphic Drivers. There are 3 ways to update the graphics drivers:
| Use OEM Websites | Visit the website related to your Graphics card and download/install the driver. |
| Use Device Manager | The Device Manager is an inbuilt app that helps update the drivers from Microsoft Servers. |
| Use Third-party Driver Updater App | We recommend Advanced Driver Updater to Update all your PC drivers with a few mouse clicks. |
Use OEM Websites
All hardware manufacturers maintain a website to provide the latest drivers for their products. You must identify the make and model of your graphics card, search for the most compatible driver, and download/install it on your PC.
Use Device Manager
The Device Manager is a driver updater tool limited to updating drivers found on the Microsoft server. Here are the steps:
Step 1: Press Win + X to open the Power menu.
Step 2: Click on Device Manager.
Step 3: Next, in the new window, click on Display Adapters to reveal the graphics card on your PC.

Step 4: Right-click on the graphics card and choose Update Drivers option.
Step 5: Select the “Search Automatically for drivers” option and follow the steps.
Use Third-party Driver Updater App
Advanced Driver Updater is a fantastic app that scans your PC for missing, corrupted, and outdated drivers and updates them with the latest version available on the internet. Here are the steps to use this app:
Step 1: Download/Install the app using the Download button below.

Step 2: Open the app and click the Start Scan Now button to scan your system for outdated drivers.

Step 3: Once the list of driver issues is displayed, look for your graphics card and click the Update link next to it.

Step 4: The app will now install the best compatible driver for your graphics card.
Step 5: Restart your PC after the process completes.
Method 5: Update Direct X
DirectX is a set of application programming interfaces (APIs) developed by Microsoft for handling tasks related to multimedia, especially gaming and video, on Microsoft platforms such as Windows. To fix this issue check your Direct X version and update it if required.
Here are the steps to check the Direct X version installed on your PC.
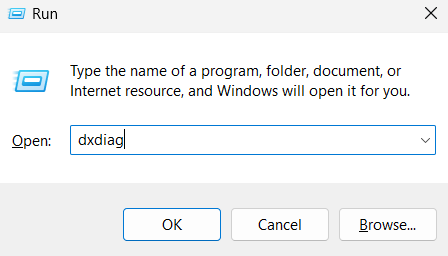
Step 1: Press Win + R to open the RUN box.
Step 2: Type dxdiag in the text space and click on the OK button.
Step 3: A new box will open, Check the Direct X Version. It was Direct X 12 when writing this blog. If you have a lower version then you need to update it.

To download Direct X 12, click on this link.
Reddit users share their experiences with the league game.
Have you resolved the error on your PC?
We hope the above methods have helped you fix the “Failed to initialize graphics device” on your PC and allow you to enjoy games like never before. Please write to us in the comments section to see which method helped you fix this issue.
Recommended :
Solved – Nvidia Graphics Driver Not Compatible With This Version of Windows


