Advanced System Optimizer – User Guide
Get all the information you need to understand this system utility suite
To install Advanced System Optimizer, click here and download the latest setup for installation of ASO.
Once you have the setup file downloaded, follow the steps to install and run Advanced System Optimizer, the PC optimizer on your Windows system.
-
Double click the setup file that you downloaded . The setup file typically looks like the image below:

- Click Yes under the UAC notification when prompted, to allow ASO to install on your PC.
-
You’ll now see Advanced System Optimizer’s installation wizard. If you want to create Desktop shortcuts for Advanced System Optimizer and Smart PC Care, keep the box checked; else, uncheck them.

-
Click Next to proceed.

-
Read the License Agreement, and if you agree, select, I accept the agreement and click Next to proceed with product installation.

-
If you want to install the product at a different location, click Browse and select the location. Else you can click Next to proceed.

-
Wait for the installation process to finish.
Note: The trial version of Advanced System Optimizer is fully functional for 24 hours. After that, most modules can perform scans and display the results. For any cleaning or optimization, you should register Advanced System Optimizer with a license key.
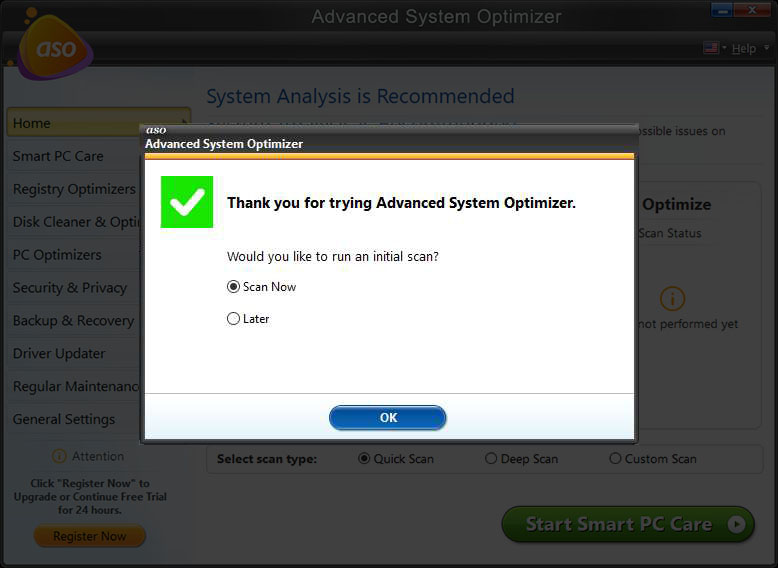
Advanced System Optimizer is an all-in-one system optimization tool that helps speed up, clean and protect your system from threats. Using this professional PC cleaner tool, you can recover deleted files, backup important data, update drivers, clean junk files, and much more. The tool offers different system tweaking tools. Furthermore, it provides “Smart PC Care,” a one-click optimization feature to perform basic PC cleaning tasks in just one click.
To use Smart PC Care, follow these steps:
-
Launch Advanced System Optimizer.
-
Select from three scan types –
- Quick Scan – as the name suggests, this scan type is quick, looking for unwanted files, cleans hidden privacy exposing traces, fixes registry issues, & optimizes the registry.
- Deep Scan – this scan type is thorough and time-consuming. Here you are able to defrag the disk, clean spyware and optimize the PC for best performance. We recommend using it when the system is in an ideal state.
- Custom Scan – this scan type gives us an option to customize scan areas and decide which to be scanned for issues.
-
After selecting the scanning mode, click the Start Smart PC Care button.
-
Wait for the scan to finish.
-
Click Optimize to fix issues and restart the PC if prompted to bring changes into effect.

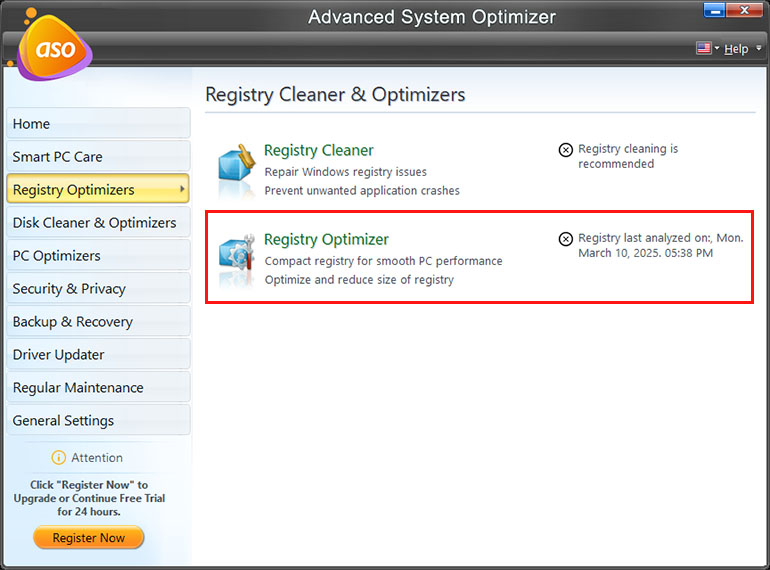
Registry Cleaner and Registry Optimizer are the two modules under Registry Optimizers. With their help, you can optimize the PC performance and clean invalid registry entries. Doing so helps eliminate the issues with Windows Registry that are commonly responsible for slowing down system performance. The two modules have different functionalities and can be used separately to clean obsolete registry entries and defrag the registry.
- Registry Cleaner – With the help of this module, you can keep the PC performance up to the mark and prevent the PC from slowing down. The module cleans invalid and unwanted registry entries, like registry files of uninstalled apps, shortcuts, etc., from the Windows Registry. This helps de-clutter the registry and improve application's read and write time.
- Registry Optimizer – as the name explains, this module helps optimize the registry. As we use our PC to install and uninstall programs, the Windows Registry gets fragmented. The Registry Optimizer module helps de-fragment the Registry and creates a new compact Registry free from gaps and fragments. This keeps the Registry entries contiguous, helps ensure quicker read times, and helps improve the PC performance, especially startup times.

Here’s what both modules do:
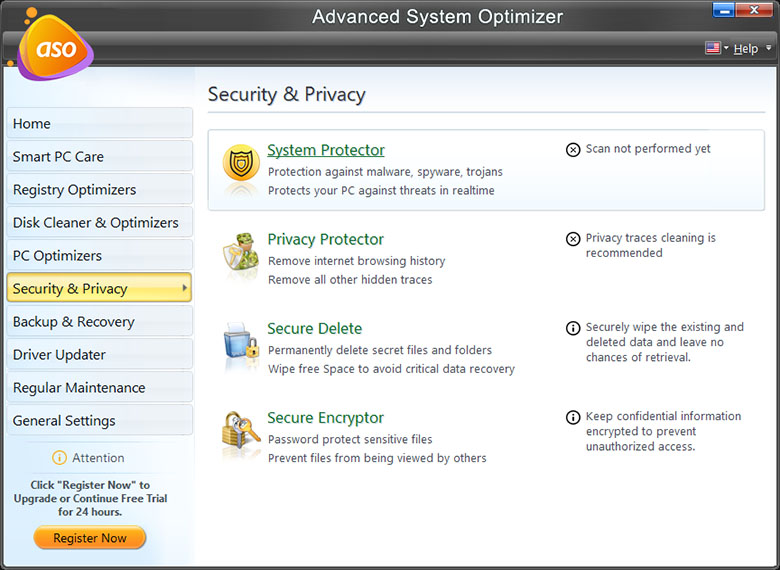
Whether you want to clean junk files, optimize disk, check the disk for issues, or know what’s taking up space, this section covers it all.
- System Cleaner – this module helps remove junk and obsolete data from the system, thereby saving precious disk space. It also finds and removes temporary files, thus saving system resources to be used for essential tasks.
- Disk Optimizer – Defrags the Hard Disk and delivers contiguous space for better storage and improved data access time. This can increase the system speed as the time to read data from the disk is reduced.
- Disk Tools – Examines the disk thoroughly and displays detailed information about the disks. Moreover, it can assist in repairing the disk boot sector and try to fix damaged disk partitions at boot time.
- Disk Explorer – Scans your system’s hard disk and displays the space being occupied by different files, and wasted by unwanted files. Using it, you can quickly filter data by file type and manage storage space based on the details of the existing files and folders in one glance.
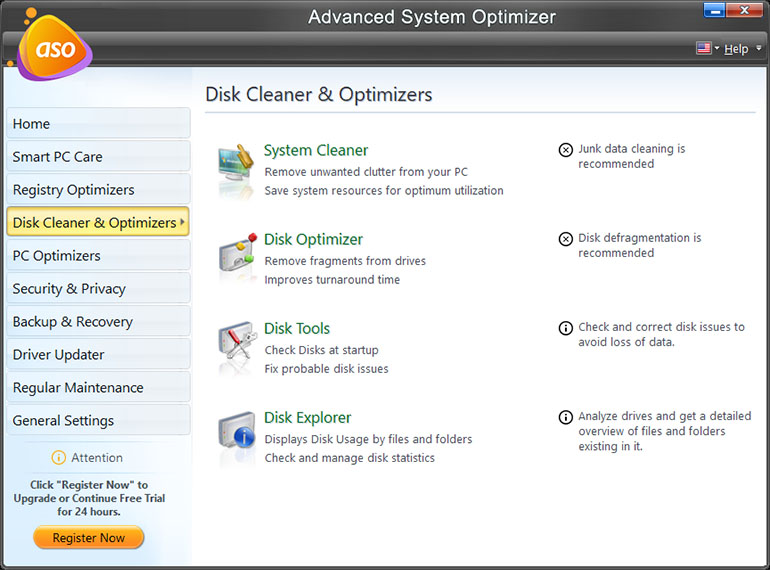
The module added to PC Optimizers boosts gaming performance, helps free up memory, and removes duplicate files. Using these modules, you can enjoy a PC with enhanced performance.
- Game Optimizer – Provides a disturbance-free environment to play games and enjoy interference-free gaming. This aids in increasing gaming performance as your focus will be on the game running on your computer. You can also use this module to remap keys and customize the keyboard.
- Memory Optimizer – Most PC users are unaware of the applications that run in the background and take up the PC’s physical memory, thus affecting its performance. Memory Optimizer helps reclaim physical memory from applications that aren’t using it without affecting system stability and thus helps boost PC performance.
- Duplicate File Remover – Copies of files saved on the PC occupy unnecessary space and make the PC slow and sluggish. The Duplicate File Remover module is offered by the best optimization tool for your PC helps get rid of these unwanted duplicate files. Using it, you can free up space, organize data and manage files, saving time wasted in sifting through unnecessary files.
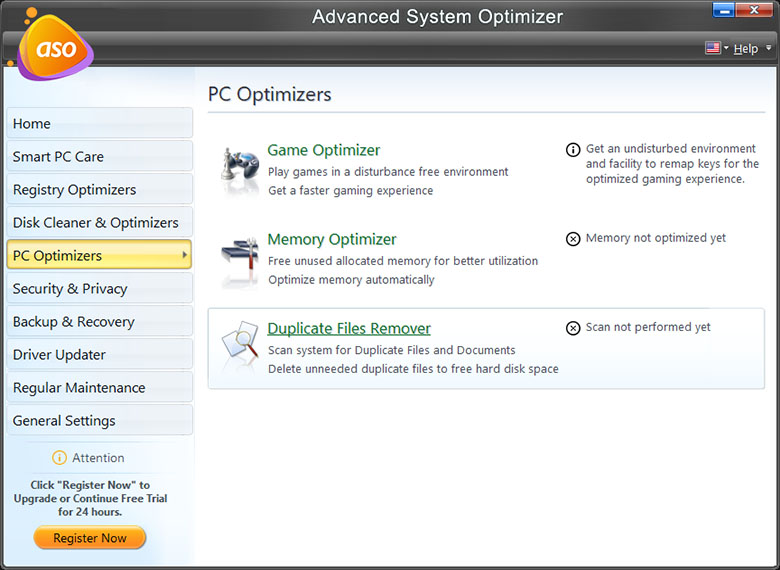
The Security and Privacy module help keep your data private and secure and protect it from malware, spyware, and trojans. Moreover, you can securely delete files and encrypt your sensitive data to protect the information.
- System Protector – To protect the PC and your data from spyware, worms, Trojans, malware, and other nasty threats, the System Protector module should be used. The security tool to prevent the PC from being harmed by malware easily detects and quarantines malware and viruses.
- Privacy Protector – Deleting your digital footprints from the PC can be cumbersome, depending on your online activity. This is when Privacy Protector steps in. The module helps erase all traces of Internet activities from the system and helps maintain privacy.
- Secure Delete – Do you want to prevent data recovery of the deleted data from your hard drives? This module is the best bet for you. It uses different techniques to overwrite data and securely erase it from the PC. Thus, making data unrecoverable and eliminating the traces of sensitive and private data.
- Secure Encryptor – When you want your data to be unreadable by an unauthorized person, encryption is the best idea. This simple utility using a complex algorithm scrambles data and protects it so that no one without the decryption key can access it.
- Undelete – Recovering deleted or lost files from the internal hard drives and removable storage devices is difficult. Fortunately, with Undelete module, you can easily restore permanently deleted documents, photos, videos, audio, and other file types on your PC.
- System Files Backup and Restore – Backup system files and restore them to the last known good configuration. Using this module, you can create file and folder backups in situations like data corruption, malware attack, or hard disk drive failure.
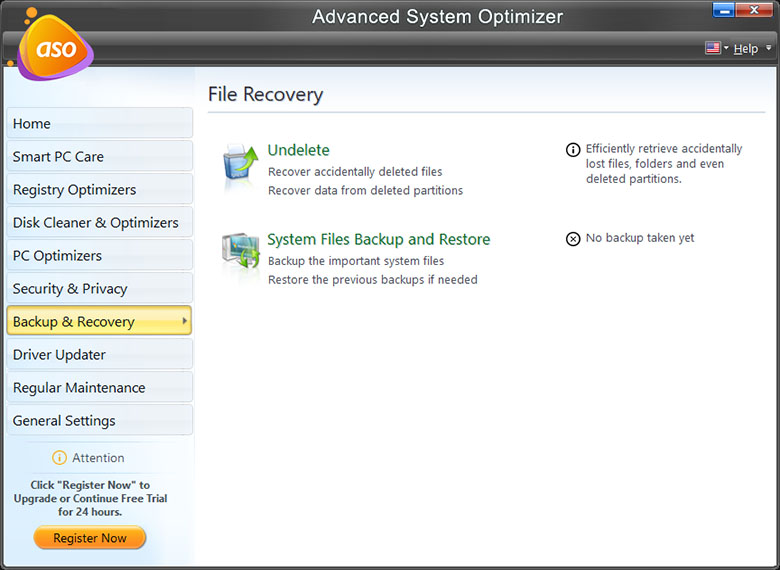
Losing important files is a nightmare coming true. Luckily, using the Undelete module, you can easily restore deleted files. Moreover, if you are a Windows 11/10/8/7 user, you also get the backup System Files and restore them using System Backup and Restore feature.
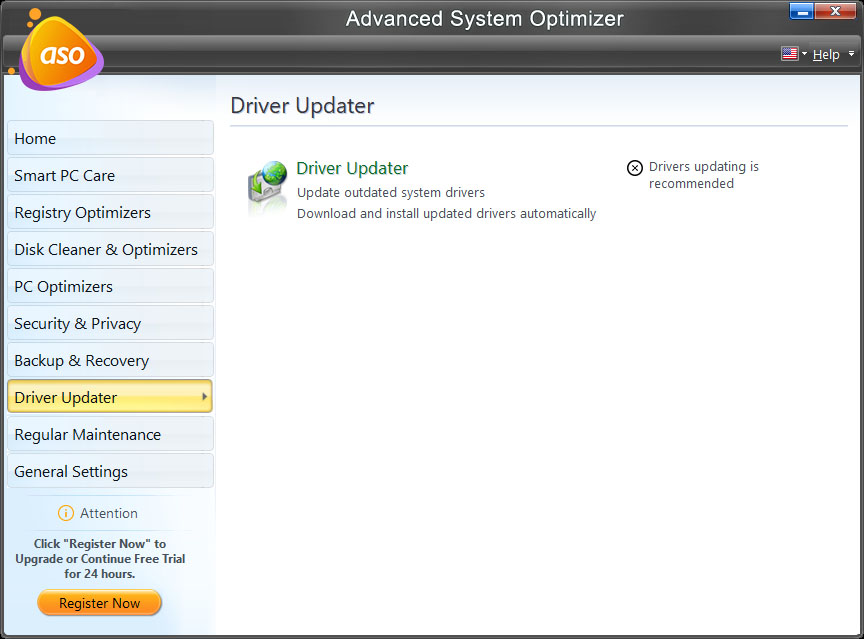
Device drivers are essential for hardware components to work smoothly with your PC. This is why you face noticeable performance issues when drivers are outdated, corrupt, or missing, and the computer becomes sluggish. To deal with this problem and to save time and manual effort in searching for driver updates manually, try using a Driver Updater.
The Driver Updater module helps update outdated drivers that may cause device-related problems and exposes the system to unknown attacks.
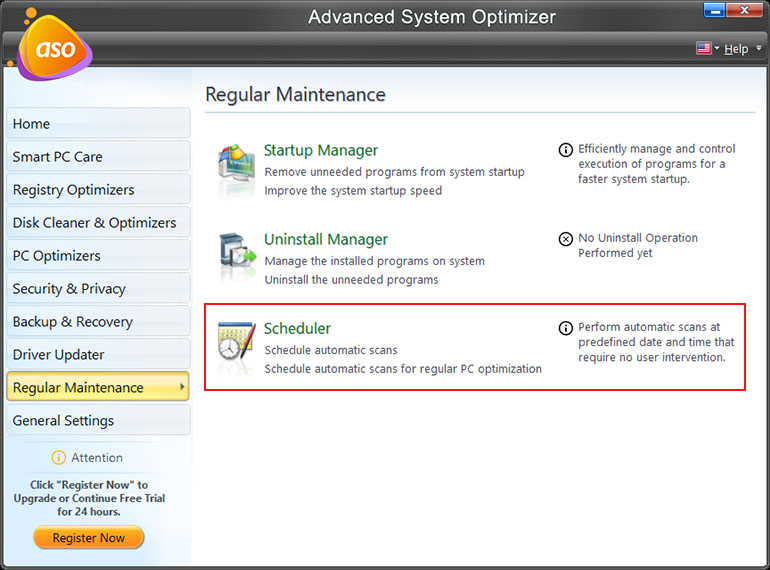
- Startup Manager – Helps manage startup programs and assists you in deciding which apps should run at boot time and which you shouldn’t. This helps deal with slow boot time and makes the PC faster, as the unwanted apps will be disabled from running at the startup.
- Uninstall Manager – Manages windows software packages and uninstalls unwanted programs, leaving no traces behind. The powerful uninstall manager helps remove software that is tough to uninstall.
- Scheduler – Want to control how and when PC optimization and cleanup should occur? The scheduler lets you manage tasks and run them on a predefined day and time without manual intervention.
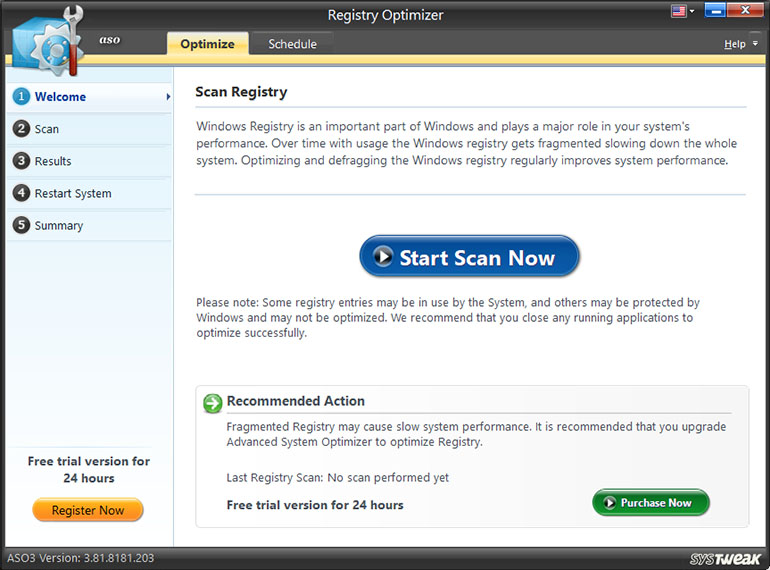
To make Windows work smoothly, the Windows Registry should be kept streamlined. You can use the Registry Optimizer module to optimize the Registry of your operating system. Here’s how to use it.
- Launch Advanced System Optimizer.
- Click Registry Optimizers > click Registry Optimizer option.
- Click the “Start Scan Now” button to analyze the registry and determine the fragmentation volume.
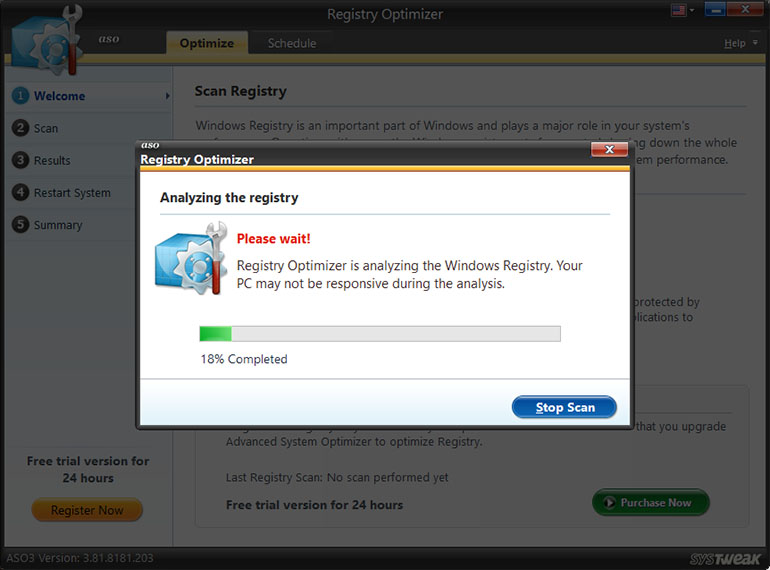
- Wait for the entire Windows Registry to be scanned. Each section of the Registry is critically analyzed to check for fragments. During the analysis, the PC might not react or respond.
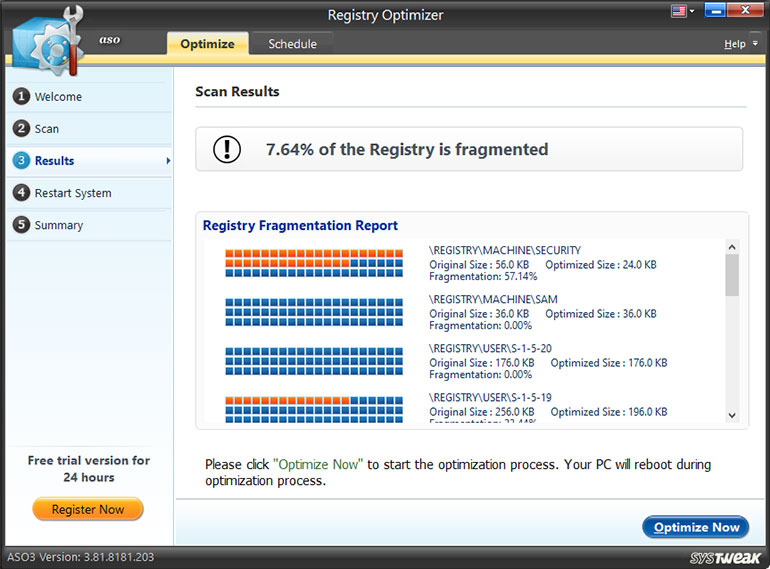
- You will now get a detailed scan report showing the percentage of fragmentation.
- To optimize the registry, click the “Optimize Now” button.
- Restart the PC to finish the process.
To permanently wipe out the previously deleted files and folders, contents of the Recycle Bin, or some data on a specific drive, leaving no probable chance for retrieval, follow these steps.
Note: Once the files are deleted using Secure Delete you cannot recover them even by using the finest recovery tool.
- Launch Advanced System Optimizer
-
Click Security & Privacy from the left pane > click Secure Delete.

-
Click the Select Files button to add files and folders that you want to permanently delete.

-
Using the “Add File” or “Add Folder” select the files and folders to be securely deleted.
Furthermore, if you want you can select the wiping method. To do so, click the Change link, as shown in the screenshot below:

-
You will have three types of wipe methods to select from:
- Fast Secure Delete
This method is the fastest but less secure way of deletion. Deleted data can be recovered using microscopic examination of disks. (Single Pass - data is overwritten once by random digits). - Random fill data streams
This method is a little slower but more secure. There are remote chances of data recovery using microscopic examination of disks. (Three Passes - data is overwritten thrice by random digits). - Secure Delete
This method is the most secure but the slowest. There are hardly any chances of retrieving the data using the microscopic examination of disks. (Seven Passes - data is overwritten seven times by random digits). It is the safest mode and therefore, is recommended.

- Fast Secure Delete
- Once the wiping method is selected click on the “Continue” button to start the process of secure deletion.
-
Check the items you wish to securely delete and click on the “Next” button.

-
Enter the confirmation code in the box to start the process and hit Next.

Secure Delete will now ask for user confirmation. Type “YES” to start the removal process.
(Note: 8. Data deleted by Secure Delete is unrecoverable).
-
When the selected data is wiped, you will get a summary of the process. It will show the total number and volume of files and folders wiped out from the system.

If you want to add more files, click on the button “Wipe More Files,” or else click the “Finish” button to go back to the main/welcome screen.
- Launch Advanced System Optimizer.
-
Click Security & Privacy from the left pane > click Secure Delete.
- 3. Click the Recycle Bin tab.

- To securely delete the items from the Recycle Bin, click on the “Start Scan Now” button & initiate the scan process.

-
Wait for Secure Delete to thoroughly analyze the Recycle Bin and detect files and folders.

-
The scan results will show the number of items found in the Recycle Bin.
-
To clean these items click on the “Wipe Now” button.
-
Confirm the action by entering the security code in the confirmation box.

- This will start the removal procedure for the items in the Recycle Bin.
- Launch Advanced System Optimizer.
-
Click Security & Privacy from the left pane > click Secure Delete.

-
Click the Drive tab.

- Select the hard drive from the drop-down list you wish to scan for already deleted files and folders already deleted. This will help permanently remove deleted files and folders.
Note - Do not select your system drive, as it will wipe all the data from it.
-
Select from the three options:
- Wipe deleted files only – permanently wipe out the files which have been previously deleted from the selected hard drive and make them unrecoverable.
- Wipe the entire drive – securely delete all the contents (existing and previously deleted) of the selected drive so that nothing is recoverable.
- Wipe free space – Choose this option to identify the free space and overwrite data on it so that no chances of data retrieval are left.
Note: To change these settings use the “Settings” tab.
Once you choose the hard drive and the kind of wipe, continue with the process by clicking on “Start Scan Now.”

Once the scan is through, the scan results are put forth. Click the “Wipe Now” button and securely delete the files and folders found in the scan.

Enter the code to proceed and click the Wipe button.

Take a look at the summary and click Finish.

To use the best PC cleanup tool & optimize memory follow these steps:
- Launch Advanced System Optimizer.
-
From the left panel of the main screen, click the PC Optimizers tab > select Memory Optimizer.

-
You'll now get a new app window that will display memory and cache usage. Click the Optimize Now button to release unnecessary occupied memory and improve your computer’s performance.

-
To change the default memory optimization setting, click on the Manual Settings tab in the left panel. Drag the slider to free the desired amount of memory > click Save Settings.

-
Once the settings are done, click the Auto Optimization option. Check the box next to Enable Auto Optimization > Save Settings.

-
Finally, click the Optimize Now button to optimize memory and manage the system's cache.

- Restart the PC.
To find and remove junk files, easily follow these steps:
- Launch Run Advanced System Optimizer.
-
Click Disk Cleaner & Optimizer > select System Cleaner from the right pane.

To run the scan, click Start Scan Now and wait for the scan to finish.

Once the scanning is done, you will get the number of unwanted files detected and the space you will recover. Moreover, you can get more information about the issues by clicking View Details.

- Once you have analyzed the results, click Clean System to remove the junk files & recover space.
In addition, to run the System Cleaner at the specified interval, you can schedule the scan. To do so, follow these steps:
- Click the Schedule tab.
- Select the schedule type, i.e., when you want to run the scan – Every Day, Once, or Every Week.
- Select the Date & Time and the Day to run the run.
- To fix the issues after scanning, click Fix the problems automatically. Also, you can decide whether you want to shut down the PC after fixing issues or not.
- When all the settings are done, click Apply to save them.
This will run the System Cleaner at a scheduled time.
To set up automatic PC optimization and cleaning, follow these steps:
- Launch Advanced System Optimizer.
-
Click Regular Maintenance > Scheduler.

- Select the module for which you want to set up the schedule. If you’re going to run one-click PC optimization, click Smart PC Care > select the areas you want to scan.
- However, if you want run Smart PC care automatically at a scheduled time, click the box next to “Schedule automatic Smart PC care” (Recommended)
- Click Apply to save the settings.
This is how you can automatically run the PC optimization tool to clean junk files, declutter it and free up disk space occupied by unwanted files.
Encrypting or Decrypting a file or a folder using Advanced System Optimizer can be done by following a few simple steps; let us see how.
- Launch Advanced System Optimizer
-
From the left sidebar, go to the Security and Privacy module > click Secure Encryptor.

-
Under the File Encryptor tab, click the select files option.

-
Select a file or the folder to be encrypted from the file explorer window.

-
Once added, it will appear in the list on System Optimizer Tool.

-
Click on the blue Encrypt button. Choose a strong password and password hint for your file and click Ok.

- Wait for finishing the encryption process, and a message appears as 'Selected file(s) were successfully encrypted.' Once done, click on the Finish button.
To use Advanced System Optimizer and free up space, follow these steps:
-
Launch Advanced System Optimizer.
-
Select Deep Scan from the Home screen and click Scan > Start Smart PC Care.

- Wait for the scanning to finish. Review scan results and hit Optimize Now.
- This way, you can clean and optimize the PC without any manual intervention.
However, if you don’t want to perform a one-click scan, you can use individual modules and clean the system to free up space.
Advanced System Optimizer is a system tweaking suite that includes more than 30 tools to improve and tweak your PC’s performance. It offers an attractive and easy to use interface that organizes all tasks into categories and provides graphical statistics whenever possible. The tools include system cleaner, registry optimizer, memory optimizer, system information, files and folders backup, file encryption, safe uninstaller, duplicate file finder, startup manager and much more. Advanced System Optimizer also includes an Internet tracks eraser with cookie manager and secure deletion, and even a Advanced System Protector. Overall, a great bundle that offers a wide range of system tools with extra benefits that are hardly ever found.
Thus, the regular issues that your PC freezes, crashes frequently, takes long time to boot-up and slow Internet connection are fixed by using Advanced System Optimizer.
Advanced System Optimizer supports Windows 11, Windows 10, Windows 7 and Windows 8 (32 bit and 64 bit) operating systems.
To uninstall Advanced System Optimizer 3, please close all running instances of the program and follow the steps below:
-
Click on Start > Control Panel > Add/Remove Programs (On Windows 7 you will see: Programs and Features option.)
-
Scroll down the list to search for the name of the product you wish to uninstall.
Click on it and then click the "Remove" or "Uninstall" button.
Follow the on screen instructions to remove the program.
No, Advanced System Optimizer 3 does not work on a Mac. It supports 32 bit and 64 bit versions of Windows XP, Windows Vista,Windows 7 and Windows 8.
The system requirements for Advanced System Optimizer 3 are as follows:
-Microsoft Windows 7, Windows 8, Windows 10 and Windows 11 (Compatible with both 32 and 64 bit Operating Systems)
-Intel Pentium 3.500 MHz or equivalent processor
-512 MB RAM
-50 MB free hard disk space
Smart PC Care is a one click solution to optimize the PC. It includes 3 types of scans.
Smart PC Care is a one click solution to optimize the PC. It includes 3 types of scans. Quick Scan is the quickest scan of the three scans. It scans 4 areas of the PC, except “Defrag hard disk for optimized performance”. Custom Scan gives you the facility to choose the areas you want to scan while Deep Scan performs a scan of 5 areas of the PC thoroughly, so it may be time consuming.
Registry Cleaner provides complete undo functionality. Restore the registry backup to resolve the issue by following the steps below:
- Run Registry Cleaner and click on Undo Changes tab.
- Select Partial Backups from the left panel.
- Select the backup you wish to restore and click on the Restore button.
It is normal for the system to become unresponsive during optimization. Once the optimization is complete, it will work normally again.
To exclude the desired file type, follow the steps below:
- Run System Cleaner and click on Settings tab.
- Click on Files To Scan option from the left panel.
- Under Types of Files to Scan option, uncheck the desired extension and click on Apply button to save the settings.
The scan will start when you reboot the system and the selected disk will be checked for issues.
Press the F11 key to exit out of the Game Optimizer environment.
The program takes a backup of the system files upon first install. Follow the steps below to restore the backup created by Advanced System Optimizer3:
- Click “Backup & Recovery” option in left panel of Advanced System Optimizer.
- Click on “System Files Backup & Restore” from the right panel.
- In the System Files Backup & Restore window, click on Restore tab.
- Now, click on Restore Backup button.
- From the window that opens, select the backup which was created when you installed Advanced System Optimizer.
- Click on the Start Restore button to restore the backup.
You will be prompted to click Yes or No. Click Yes. Your system will reboot to complete the restore.
You can only encrypt files using Secure Encryptor. It does not have the option to encrypt folders.
Please send us the exact name of the tip you used and we will send you a patch to undo the changes.
We use the class nav-pills instead of nav-tabs which automatically creates a background color for the tab
Tech Specifications
Compatible with: Windows 11/10/8.1/8 and 7 (both 32 and 64 bit).
Minimum Memory (RAM): 512 MB.
Minimum Hard Disk Space: 500 MB.
Processor: Intel Pentium 4 or later.

