 Advanced System Optimizer
Beware Of Fraud Calls & Emails
It has come to our notice that certain people/companies may be impersonating Systweak Software and/or other reputed companies, and are contacting users to promote their services in our name via fake emails and calls.
Please note Systweak Software does not make any unsolicited calls nor sends emails to anyone regarding errors on devices or internet browsing or any such other device issues.
We urge you to beware of any such scammers and request you to NOT call back any number provided in the email or via caller ID in case you receive any unsolicited calls or emails.
Please reach out to us at report@systweak.com in case you come across any such scammers and fraudsters impersonating Systweak Software.
- Getting Started
- Why Should You Use A PC Cleaning Software?
- What is Advanced System Optimizer?
- What is Smart PC Care?
- What makes Advanced System Optimizer the best PC Optimization tool?
- How to Install Advanced System Optimizer
-
 Registry Optimizers
- What is Registry Optimizer
- Disk Cleaners and Optimizers
-
 PC Optimizers
-
 Security & Privacy
- Backup & Recovery
-
 Common Issues Fixers
- Driver Updater
- Regular Maintenance
- General Settings
Advanced System Optimizer / Regular Maintenance
Regular Maintenance
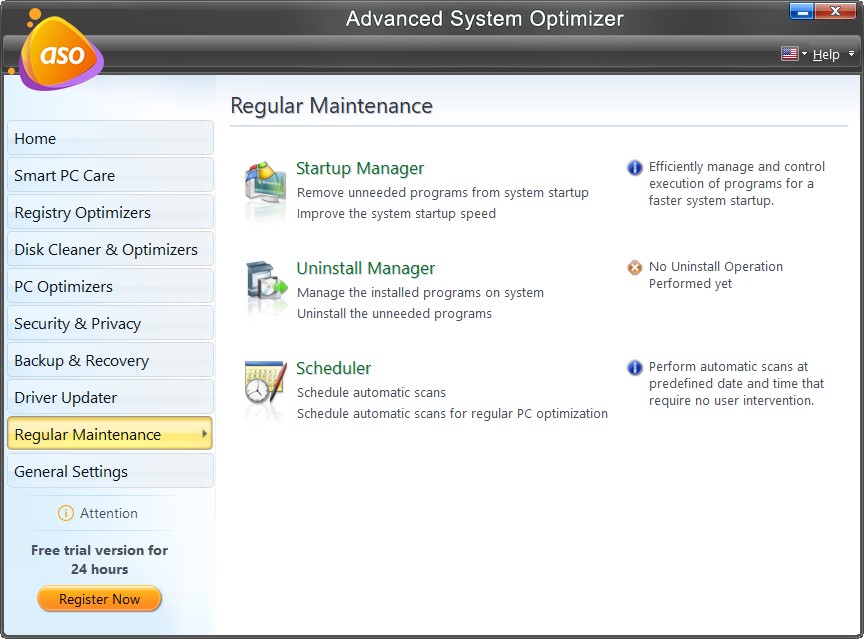
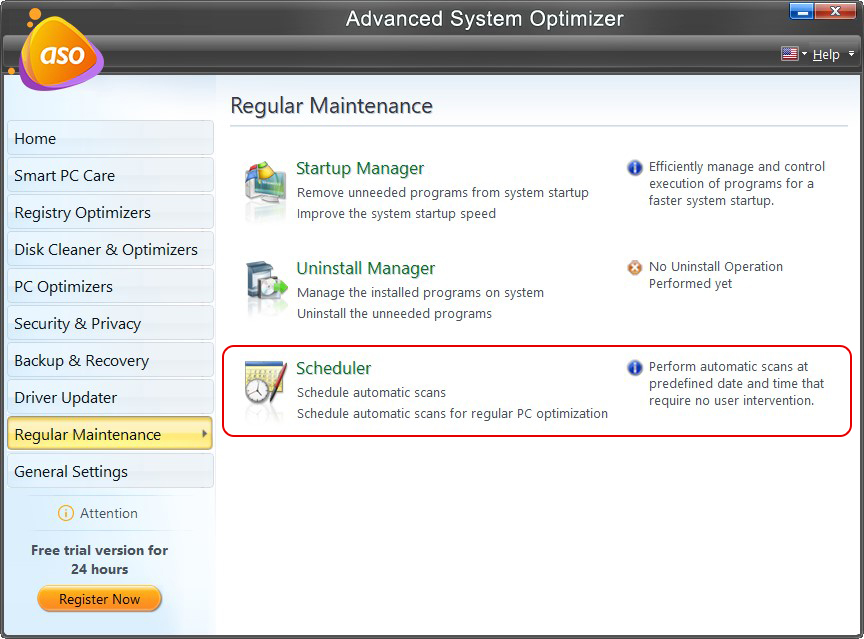
- Startup Manager - Manages startup programs to boost system boot time.
- Uninstall Manager - Help uninstall unwanted programs completely, leaving no traces behind.
- Scheduler - Helps perform tasks on a predefined day and time without manual intervention.
Startup Manager
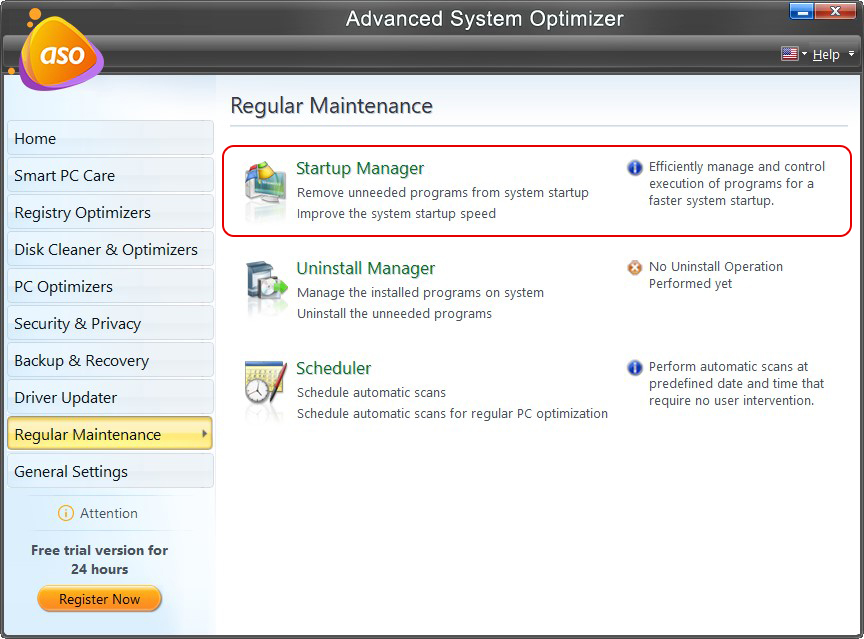
We install a number of programs on our PC but don’t want them all to execute when the system starts, right? Still, some programs run at the boot time without our permission.
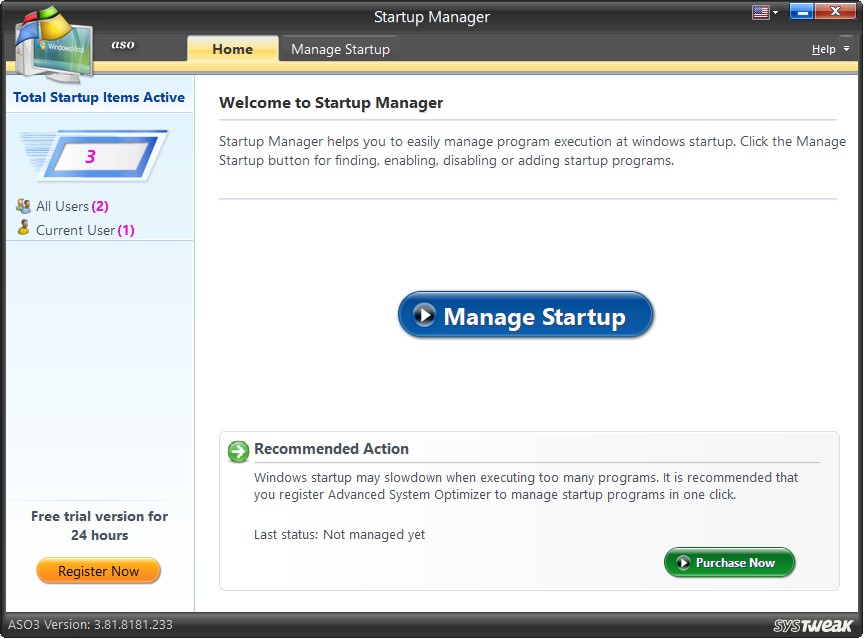
Startup Manager helps easily manage program execution at windows startup. The module scans the PC for the programs executing on startup, this helps easily disable or enable programs you want to at the system start-up.
Programs added to the startup folder can be easily viewed or removed using the Startup Manager.
It has an easy-to-use interface that displays all the programs in a list view that run at startup.
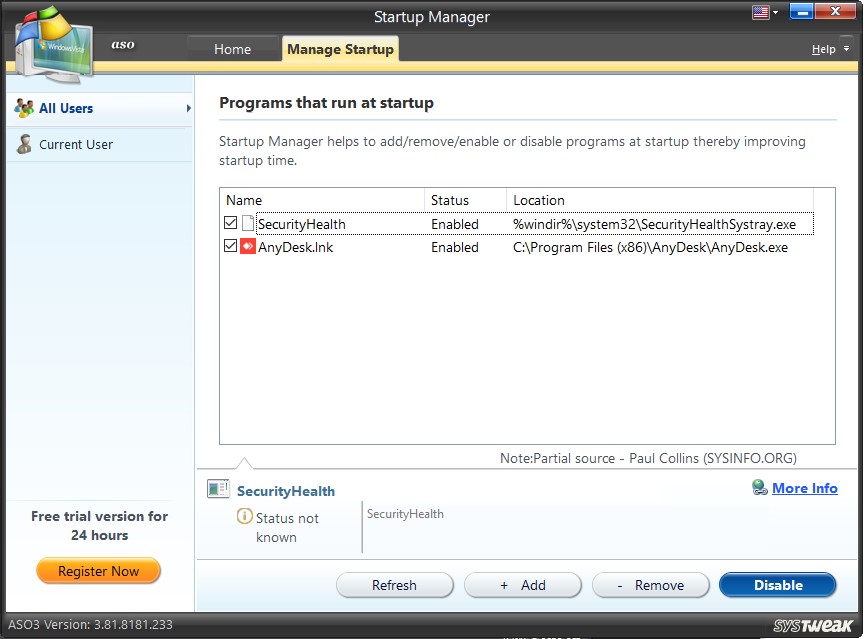
The left pane is divided into two sections -
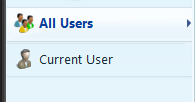
All Users
Changes made under the All-users group will apply to all users of your system. The programs specified here will start on Windows startup for all the users of your system.
Current User
Changes made under the Current User group will apply to the currently logged-on user. The programs selected under this heading will start on Windows startup for the currently logged user.
How to use Startup Manager?
Using Startup Manager is simple, just click on the Manage Startup button and wait for the tool to provide you with the list of programs that run at windows startup.
Once you have the list at the bottom you will see different buttons:

Refresh
Add
Remove
Enable
Using them you can enable to disable Startup programs.
To temporarily disable a program, uncheck the box next to it. However, if you think you will not use it in the future select it and click Remove, this will help keep the list organized.
How to Add program in Startup Manager?
To add a program, click Add.
In the new window that appears enter the name of the program, you want to run and click the three dots to go to the location of the .exe file.
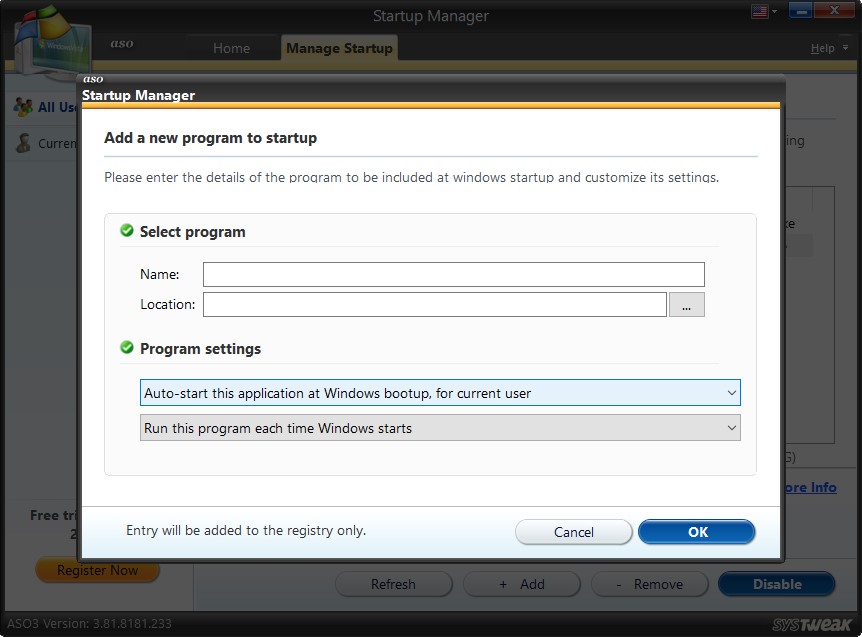
Select it and click Ok.
The selected program will now run at Startup.
How to Remove an Entry from Startup?
1. Run Startup Manager.
2. Select the program name you want to remove and click the Remove button.
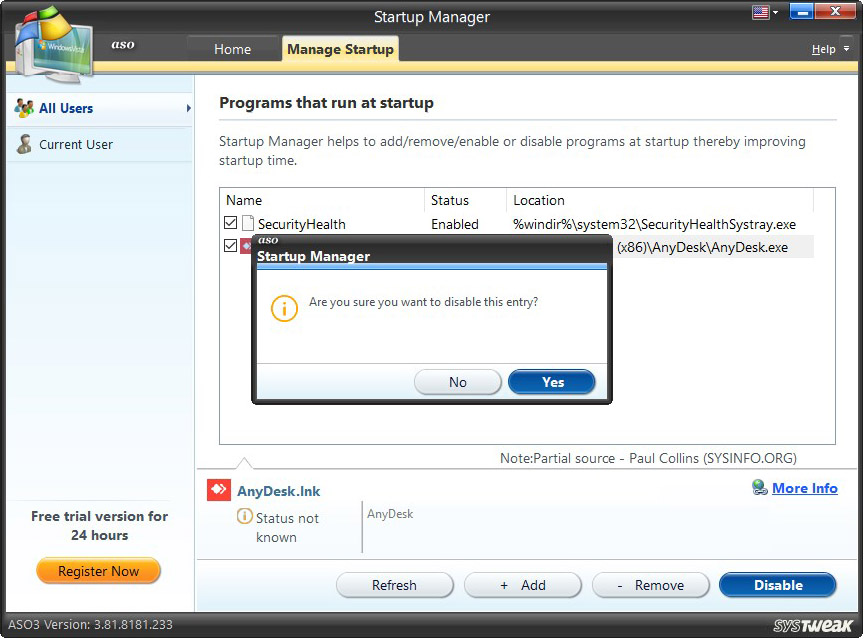
3. You will be asked to confirm the action click Yes.
This will remove the selected entry from the startup.
Uninstall Manager
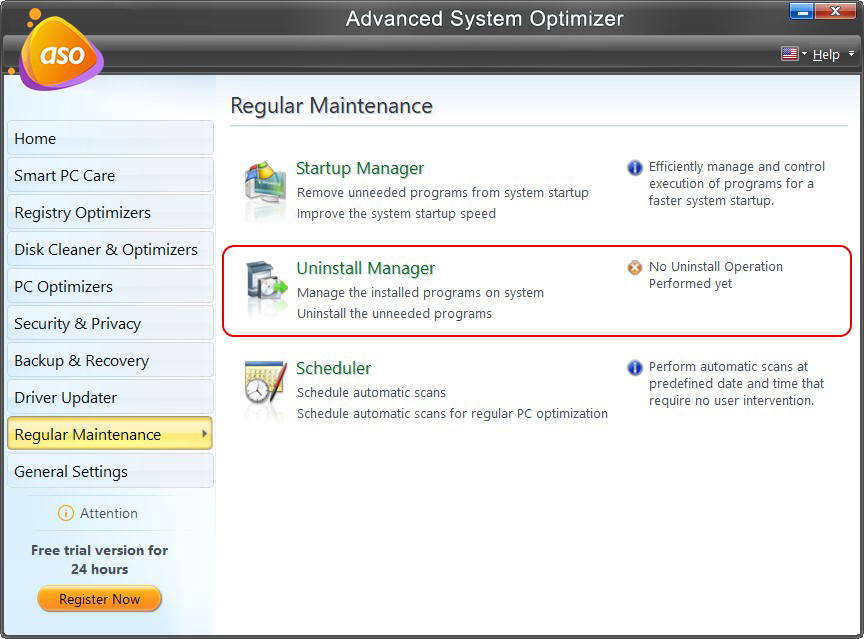
We install many applications and programs on our system, but sometimes, some of these programs become unwanted and obsolete. These can be removed from the system, and precious disk space can be freed for storing new entries.
Uninstallations can be done manually, which is time-consuming and does not guarantee complete uninstallations of programs. The best suited for this purpose is the Uninstall Manager. It helps you manage software programs on your system and helps to uninstall them completely without leaving traces on a system that might interfere with the working of other software applications.
Why is it important to uninstall unwanted programs from the system?
Software programs are constantly installed as per requirements and necessities. The number of programs collected on the system keeps on increasing. Out of these installed programs, many are no longer needed.
As each program installed on the system consumes a part of hard disk space, it is necessary to remove all obsolete programs and save valuable hard disk space.
How does Uninstall Manager help?
Over time, the number and volume of installed programs grow in size. The unneeded program can be uninstalled, and a reasonable chunk of disk space can be freed up.
Uninstall Manager performs safe and fast uninstallations. It helps to uninstall the programs completely with all the associated and supporting files and references. The hidden files are also removed such that no remnants of the uninstalled programs are left behind to cause trouble.
Manual uninstallations consume a lot of time, and it would be very difficult for novice users to uninstall programs in their entirety. Removing icons from the desktop and deleting programs from the lists does not uninstall a program. Software programs are a set of many files, folders, executable files, and supporting files. The whole group or the cluster must be removed from the system, ensuring 100% uninstallation. A single component left behind may act as a disturbing element.
Uninstall Manager is designed with an attractive and simple-to-understand interface. It does the job of uninstalling programs with quite an ease, giving no botheration to the user. It is a far better and less cumbersome alternative to uninstalling programs from the Control Panel using the "Add or Remove programs" application.
It lets you view all the installed software programs on the system and safely uninstall the unneeded programs with all associated components. This helps in saving a lot of storage space and helps you to get rid of unnecessary applications with simple clicks.
How to uninstall a program?
Uninstall Manager is a powerful and very safe tool to execute uninstallations of unwanted programs. In two simple steps, uninstallations are done, i.e., view the installed programs and uninstall the unwanted ones from them.
Home Tab
Step1: Welcome Screen
View installed programs
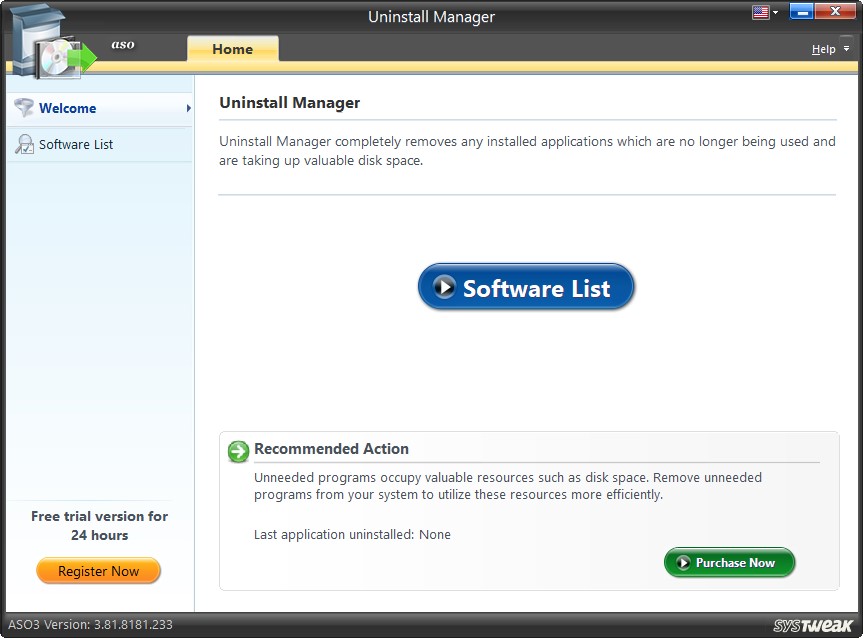
Launching the Uninstall Manager collects all the data from your system regarding the details of the software programs installed. On clicking the "Software List" button, a list of all installed programs appears.
The System Summary displayed tells us about the Total Installed Programs Found, the Last Application Uninstalled On, and the Last Application Uninstalled.
Step2: Software List
Uninstall unwanted programs
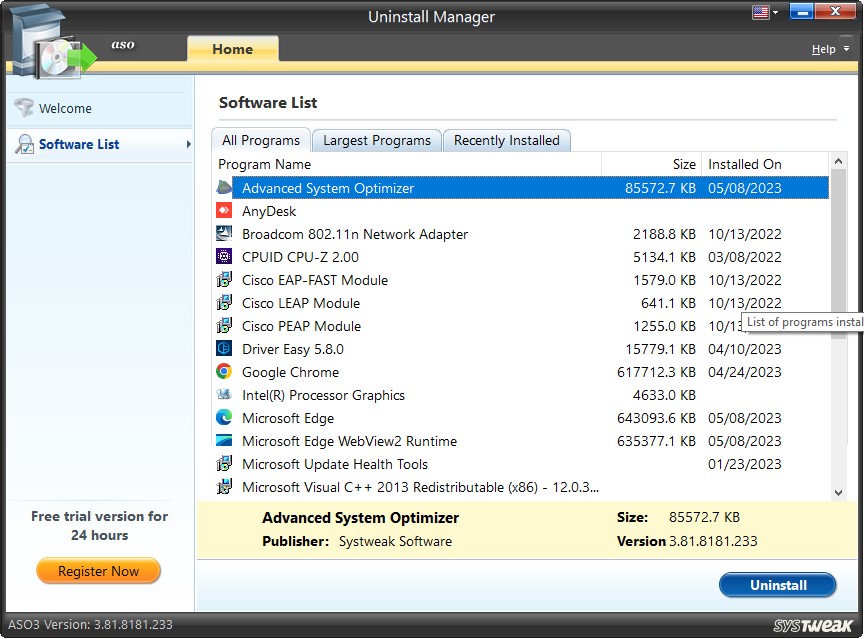
This screen shows three lists. You will find all the details related to each program on the screen, via the program's name, size, date when installed, Publisher name, and Version.
- All Programs - This list shows the details of all the software programs installed on the system.
- Largest Programs - This list shows the details of the installed software programs which are more than 50MB in size.
- Recently Installed - This list shows the details of the installed software programs which are recently been installed on the system (less than 60 days).
Programs may be selected one at a time and may be uninstalled by clicking on the "Uninstall" button. The program uninstalled using this tool is safely removed from the system with all its associated files and references.
On right-clicking on any program, the context menu shows two options, Uninstall and Remove Entry.
Uninstall – You may click on this to remove the selected program entirely from the system.
Remove Entry – You may click on this to remove the selected program from the list such that it does not appear again in the list and hence cannot be uninstalled. This can be done with programs that are important for the system and, in no case, should be uninstalled.
Scheduler
Nowadays, having all-around protection on the system without manual intervention is asked for. Scanning in different system areas at regular intervals may be a solution. This helps locate the exact problems you might be facing and automates the scan.
In such a scenario, optimizing the system using all the tools Advanced System Optimizer provides can prove beneficial. But to maintain this consistency in speed and performance, regular attention is needed, and conducting routine scans is a good idea. Some areas need frequent maintenance, while others might not, and because of this, surely scan intervals also vary.
A Scheduler is designed for this purpose and also helps safeguard the health of the system you work on. It enables you to set the time and the date for unattended scans. With its scheduled auto-scans and tasks, Scheduler helps constantly check your PC's security and performance without demanding the user’s intervention.
What does the Scheduler do?
The prevalent worldly situation calls for constant monitoring of computer systems. The scheduler helps scan the areas scheduled at predefined dates and times. Even if you forget, the Scheduler will automatically scan and put forth the results. The detected issues can also be fixed if you opt to do so using the option "Fix the issues automatically."

These scans may help maintain your PC’s best health and state. You may always count on Scheduler to avoid the hassle of remembering periodic scans. It will automatically run the specified scans at a specified time and date. To view and edit scheduled scans, click "All Scheduled Items."
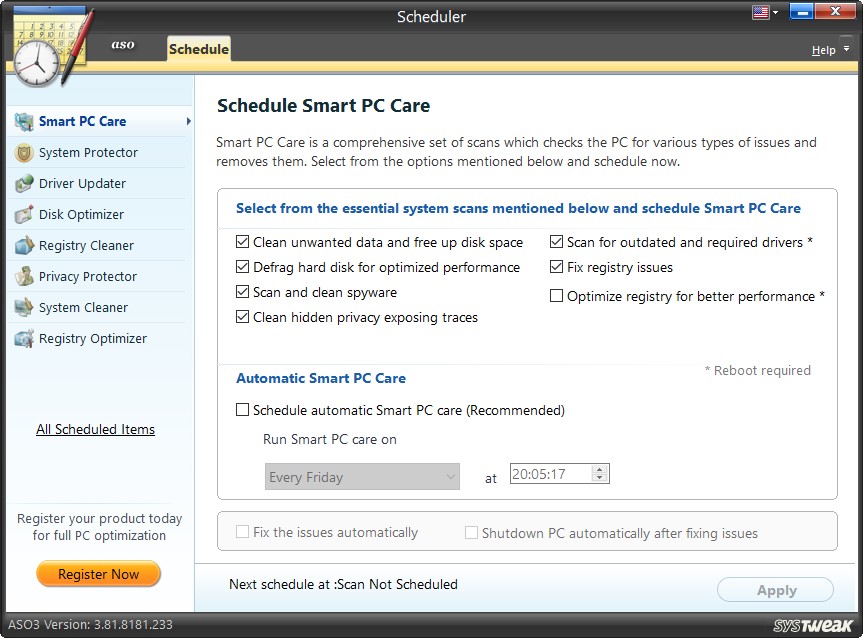
The scheduler allows you to schedule automatic scans for 5 modules. You may navigate the modules from the left panel and schedule future scans.
Two important options are also added for the user’s convenience.
Fix the issues automatically – You may check this option to allow Advanced System Optimizer to auto-correct the issues after the scans.
Shut down the PC automatically after fixing issues – You may check this option to allow Advanced System Optimizer to shut down the PC after fixing all the issues.
Smart PC Care

Smart PC Care comprises a set of 5 important scans. Various system areas are analyzed in one click, and the number of issues detected is displayed. Scheduling automatic scans for "Smart PC Care" will mean multiple areas will be examined in one go. Multiple schedules can be created using similar or various sets of scans each time.
Schedule Automatic Smart PC care (Recommended) – It is recommended that weekly scans should be scheduled under Smart PC Care. Hence, you may select a day of a week from the dropdown list and set a time. The Smart PC Care will automatically perform 5 important scans at the specified time on a particular day of the week.
Options Fix the issues automatically and Shutdown PC automatically after fixing issues are optional.
System Protector
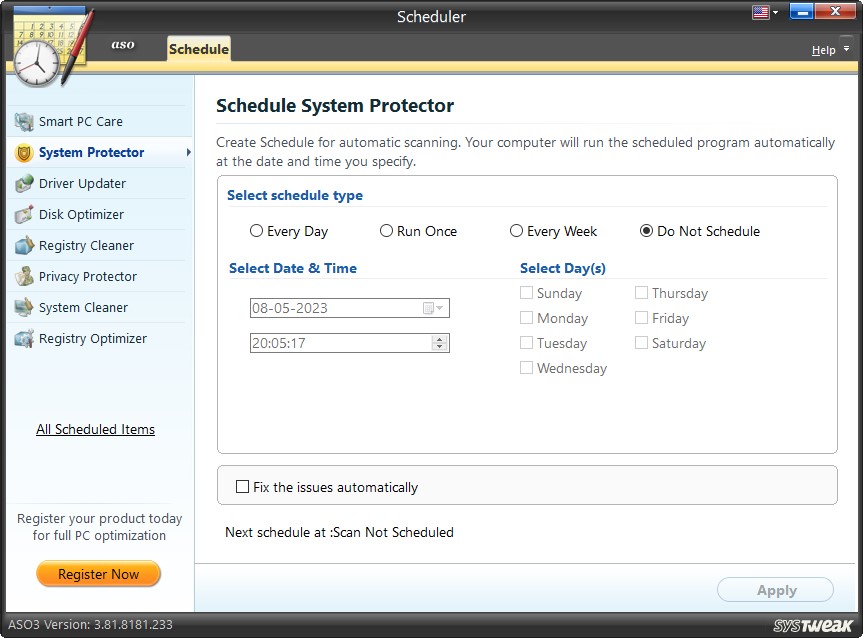
When the PC is infected by viruses, malware, spyware, and other nasty threats, it starts acting up. Therefore, cleaning these threats from the PC is necessary to run the application normally and use the computer. However, due to work and sometimes because of our laziness, we keep delaying the scanning. In such cases, scheduling scans to scan the PC for threats is a great idea.
Using the Scheduler module, you can scan the PC for threats regularly and keep it infection free by selecting the option "Fix the issues automatically."
Driver Updater
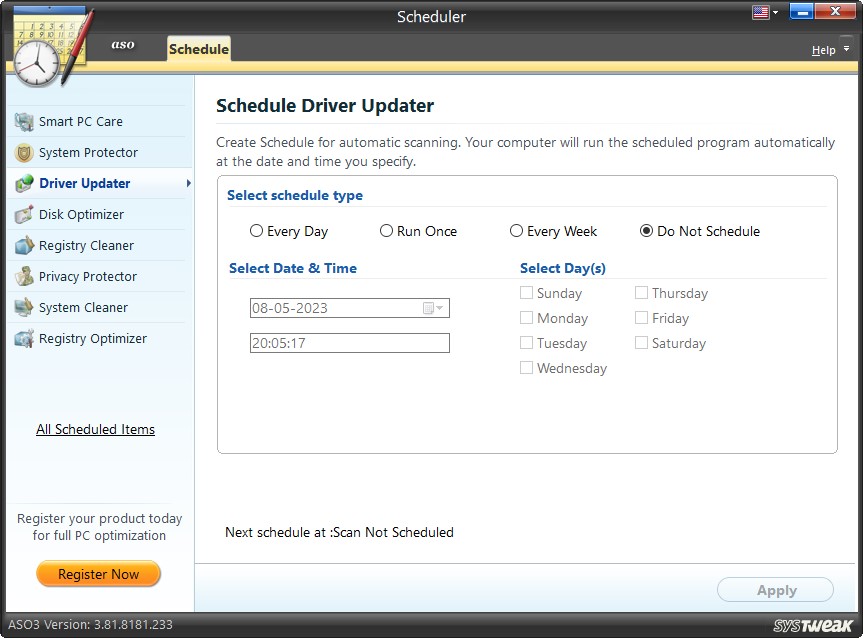
For the smooth functioning of the PC and connected device, keeping the device drivers updated is a must. However, most of us avoid it because we fear downloading incorrect drivers and the manual steps involved. To deal with this issue and to keep drivers updated, you can schedule driver scanning using the Scheduler. This way, you can keep track of outdated, corrupt, and problematic drivers and update them when an update is available. This will fix security issues and help you use the advanced features added to the device.
Disk Optimizer
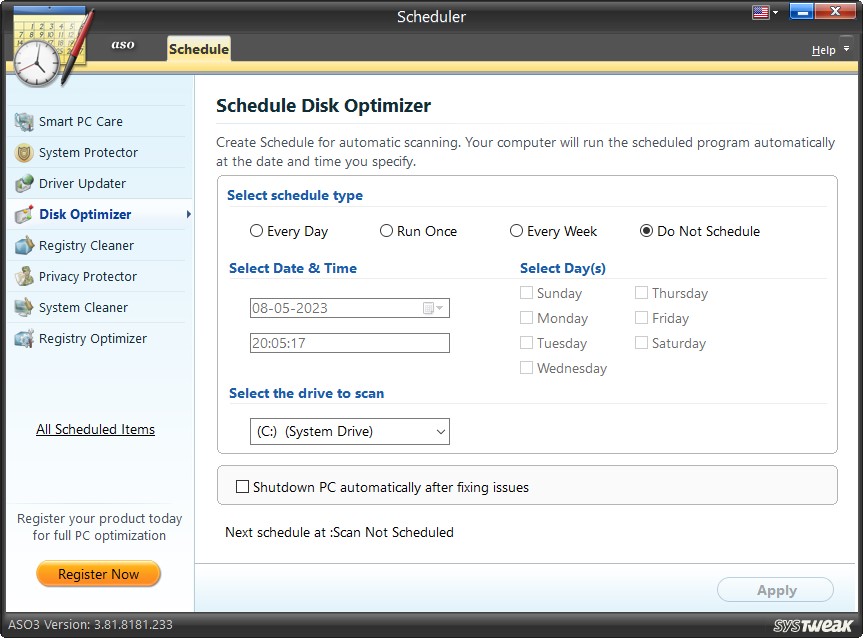
With constant use, the hard disk tends to get fragmented. Defragmentation makes the storage not only inefficient but also negatively affects system performance. In such circumstances, scheduling future scans and learning about the hard disk status through scan results will help us decide whether defragging should be done.
You may select the drive to be scanned as per choice. Only one drive can be scanned in a single scheduled scan. Multiple schedules can be created to scan all the drives.
Option, Shutdown PC automatically after fixing issues is optional.
Registry Cleaner
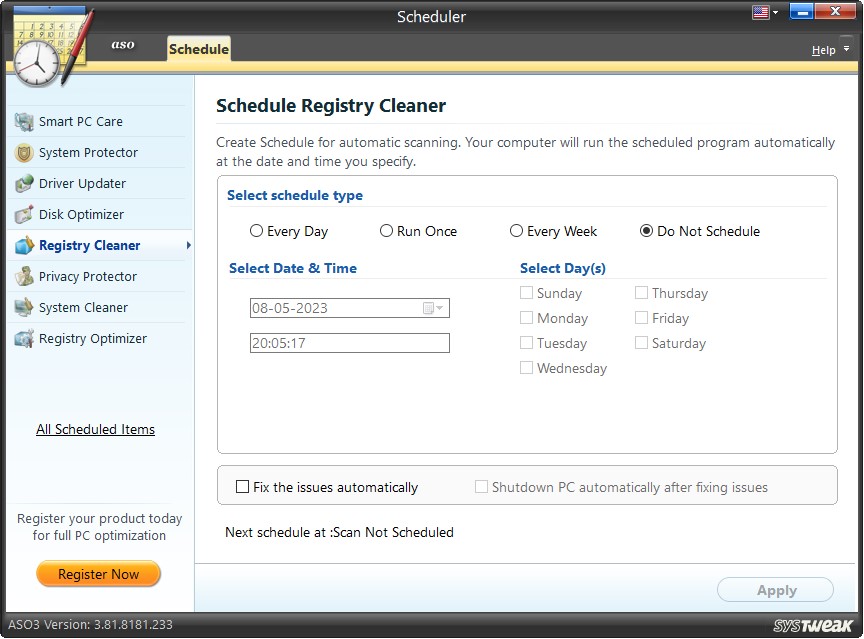
The registry is an inevitable part of Windows. Invalid and obsolete entries start cluttering the Registry and slow down the system. Regular scanning and cleaning may prevent such a thing from happening. Automatic scans may be scheduled using various scan options using Scheduler.
Options Fix the issues automatically and Shutdown PC automatically after fixing issues are optional.
Privacy Protector
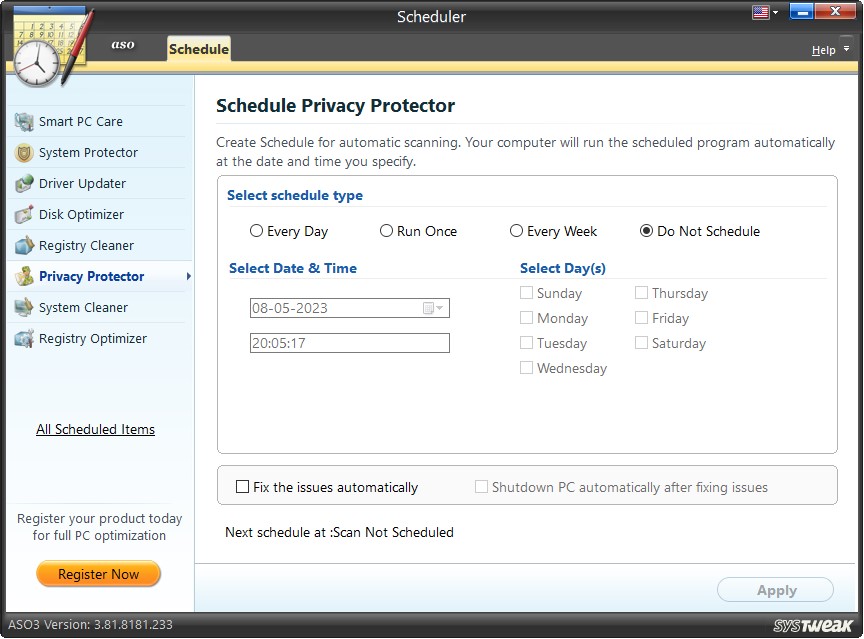
Privacy Protector erases all the evidence of internet and computer-related activities. The internet and browsing history should be regularly deleted from the system to maintain privacy. You may count on the Scheduler to schedule regular scans.
Options Fix the issues automatically and Shutdown PC automatically after fixing issues is optional.
System Cleaner
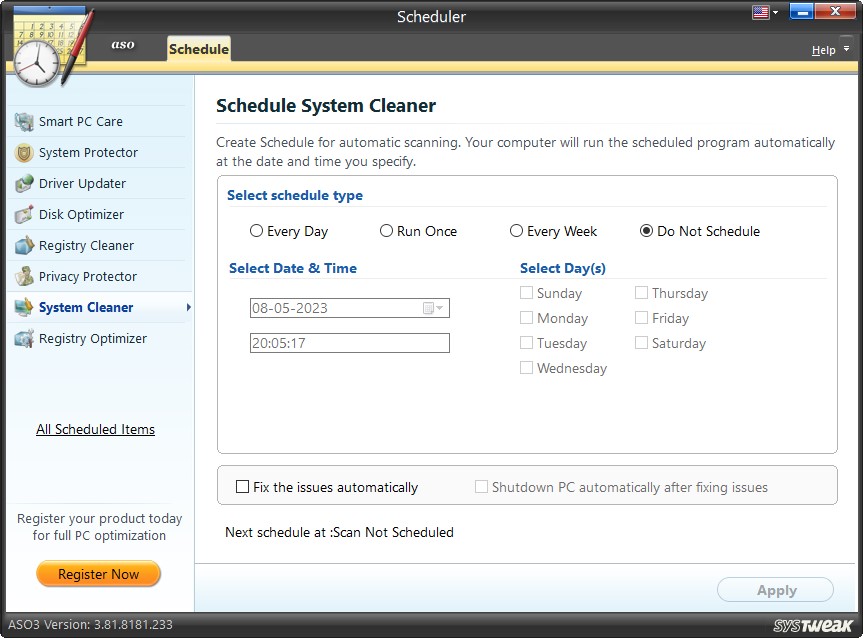
Importantly, the system must be regularly cleaned of accumulated junk. These occupy hard disk space and increase data access time. To prevent system unresponsiveness, regular cleaning of junk is a must.
The Scheduler helps to automatically scan at the scheduled time and put forth the level of junk accumulated on the computer. Accordingly, you may clean the junk regularly.
Options Fix the issues automatically and Shutdown PC automatically after fixing issues is optional.
Registry Optimizer
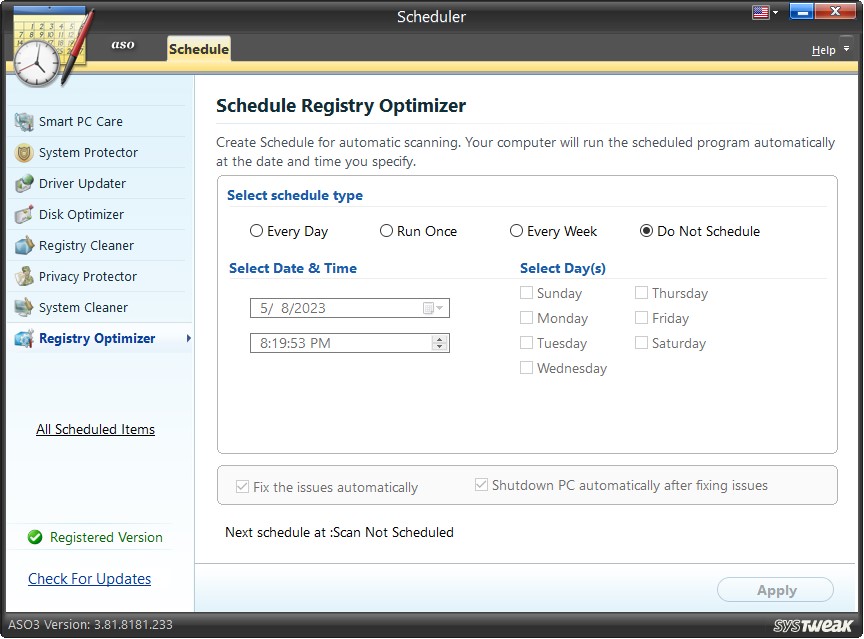
Registry is a vital part of Windows; a regular analysis should be prioritized. With time it gets fragmented and adversely affects the computer response time. Schedule multiple auto scans.
Options Fix the issues automatically and Shutdown PC automatically after fixing issues is optional.
Schedule Options
1). Select schedule type:
Four options are provided under this section. You may choose an option by clicking on each radio button.
- Every Day – You may schedule automatic scans every day at a predefined time. Set the time under the "Select Date and Time" section.
- Run Once – You may schedule the scan to run once on any date you wish to. Set the date and time from the "Select Date and Time" section.
- Every Week – Scans can be scheduled to run once, twice, thrice automatically, or more than three times a week. Select the day(s) in a week and when you want to run the scans.
- Do Not Schedule – You may also choose 'not to schedule' scans or 'undo auto-scan schedules' by clicking on this option.
2). Select Date and Time:
The date and time can be set using the date and the time edit boxes under this section.
3). Select Weekday(s):
Check the boxes against the day(s) of a week when you wish to run the scheduled scans.
