 Advanced System Optimizer
Beware Of Fraud Calls & Emails
It has come to our notice that certain people/companies may be impersonating Systweak Software and/or other reputed companies, and are contacting users to promote their services in our name via fake emails and calls.
Please note Systweak Software does not make any unsolicited calls nor sends emails to anyone regarding errors on devices or internet browsing or any such other device issues.
We urge you to beware of any such scammers and request you to NOT call back any number provided in the email or via caller ID in case you receive any unsolicited calls or emails.
Please reach out to us at report@systweak.com in case you come across any such scammers and fraudsters impersonating Systweak Software.
- Getting Started
- Why Should You Use A PC Cleaning Software?
- What is Advanced System Optimizer?
- What is Smart PC Care?
- What makes Advanced System Optimizer the best PC Optimization tool?
- How to Install Advanced System Optimizer
-
 Registry Optimizers
- What is Registry Optimizer
- Disk Cleaners and Optimizers
-
 PC Optimizers
-
 Security & Privacy
- Backup & Recovery
-
 Common Issues Fixers
- Driver Updater
- Regular Maintenance
- General Settings
Advanced System Optimizer / Disk Cleaners and Optimizers
Disk Cleaners and Optimizers
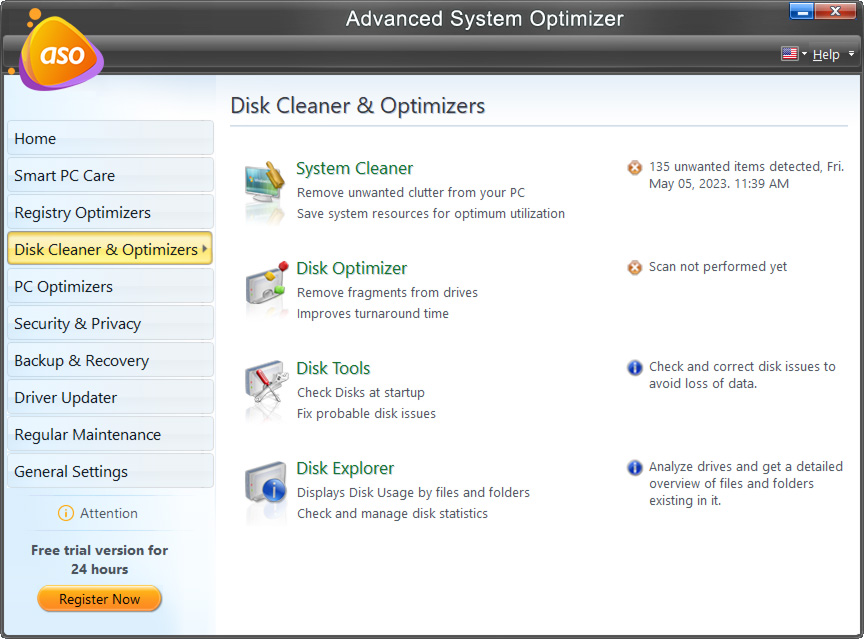
With the increase in electronic devices, our dependency on them is increasing. This makes working on a slow device very difficult. However, the decrease in the system's performance over time is inevitable, which is why we encounter the following issues:
- System Cleaner - Helps remove junk and obsolete data from the system, thereby saving precious disk space.
- Disk Optimizer -Defrags the hard disk and delivers contiguous space for better storage and data access.
- Disk Tools - Examines the disk for disk issues, displays detailed information about the disks, shows temperature, read and write time, health, and much more.
- Disk Explorer - Helps view the complete details of the existing files and folders at a glance.
What does System Cleaner module do?
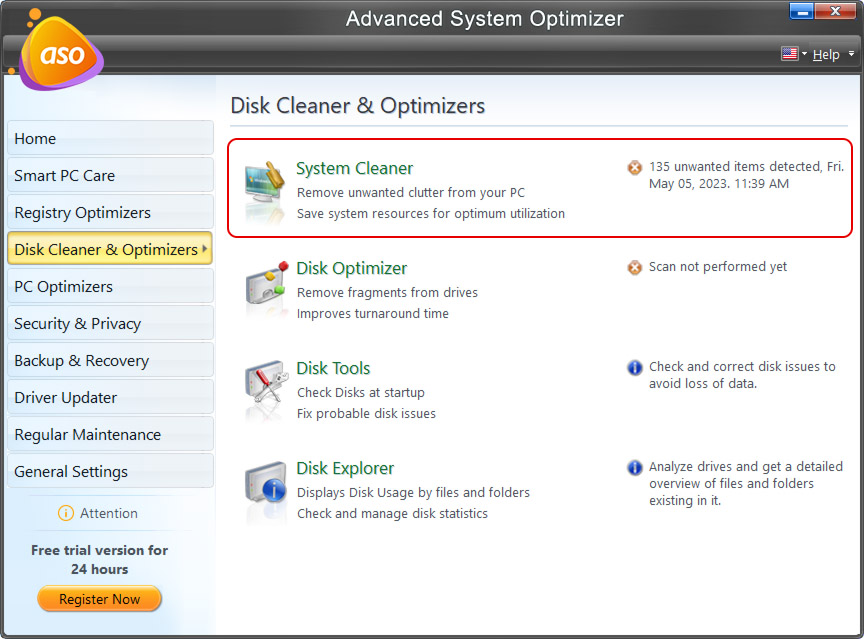
Optimizing a PC is as important as oiling your car’s engine. Hence, regular disk cleaning and system optimization are required to boost the PC's performance. Moreover, junk files, temporary files, and leftovers of the uninstalled programs occupy unwanted hard disk space; this unnecessarily exhausts the disk storage, making you encounter Low Disk Space error messages.
All this negatively affects productivity, thus, making clearing out hard drives a must.
Why should you delete unnecessary files and clean up the disk?
Have you ever faced a blinking screen during a computing task? Or does the Blue Screen of Death (Stop Error) just pop up? These glitches occur when your computer is full of junk files, the most neglected and unused data that clogs the PC and takes up unnecessary memory space.
These temporary files get created when the system is used, and actions like opening documents, browsing the web, etc., are performed. Till the time a task is under execution, these files are helpful. After that, they are of no use. Yet Windows keeps them stored, and this junk data increases in size over time, consuming a considerable amount of hard disk space.
In addition, when an application is uninstalled, useless traces are left behind, interfering with the system's and other applications' smooth functioning.
This makes cleaning the disk and removing unwanted files necessary.
What happens when Junk files get to accumulate on the system?
- The system slows down.
- It takes a longer time than usual to boot and shut down.
- Frequent application crashes with fatal issues.
- Low disk space, unable to save essential data as hard disk space is preoccupied.
- System crashes.
- Cross-linked drive references.
System Cleaner, the disk cleanup utility, is created to avoid these issues. It quickly identifies useless data on the system and eliminates them instantly. With an advanced search mechanism, this best disk cleaner accurately and rapidly detects junk files based on location, size, and specific attributes. Moreover, it allows selecting files to scan and exclude.
In addition, you can schedule junk file cleaning and decide whether to move them to Recycle Bin or delete them permanently.
Which files are considered Unwanted?
Some examples of junk include temporary internet files, downloaded program files, thumbnails, recycle bin, cache, and cookies.
Temporary files are created to speed up page loading, but when these files stay after exiting or closing a website, they clutter the system. Whereas downloaded program files get installed with an app installation, and Thumbnails are image previews that help load an image faster. Deleting these files is safe and does not cause any problems.
In addition, the files you delete from your Windows are moved to the Recycle Bin. If you do not want them in the future, you can remove them from your system.
How to delete unnecessary files using the best System Cleaner?
When unneeded and useless data that occupy valuable disk space is removed from the system, a massive improvement in system speed is noticed.
With System Cleaner running on the PC, this job becomes relatively easy, and you can save yourself from manually identifying and cleaning junk files. Its friendly interface and design make detecting unnecessary files and cleaning the hard drive a piece of cake.
The analytical scanning is divided into 5 simple steps under the Scan tab (refer to the left pane):
Scan Tab
1). Welcome
2). Scan
3). Results
4). Clean
5). Summary
Step1: Welcome
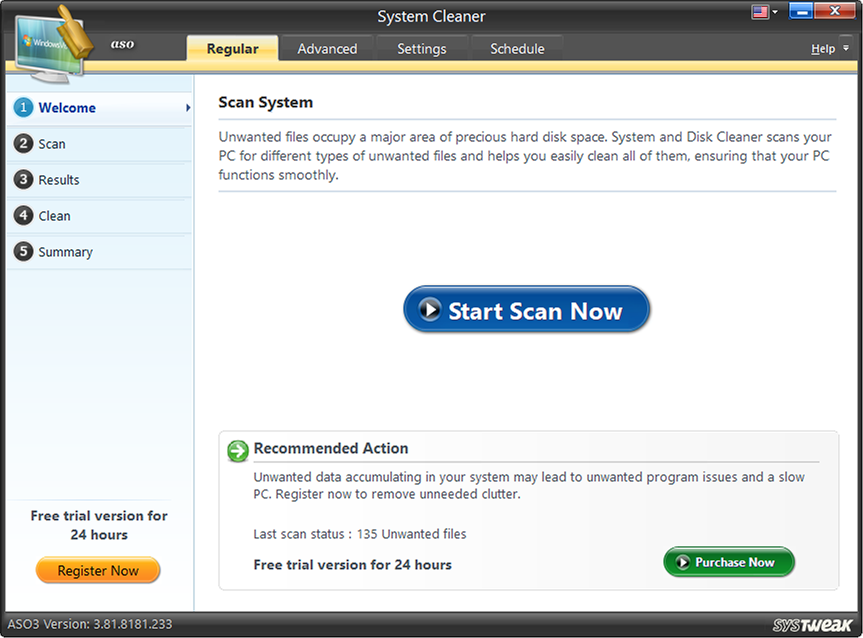
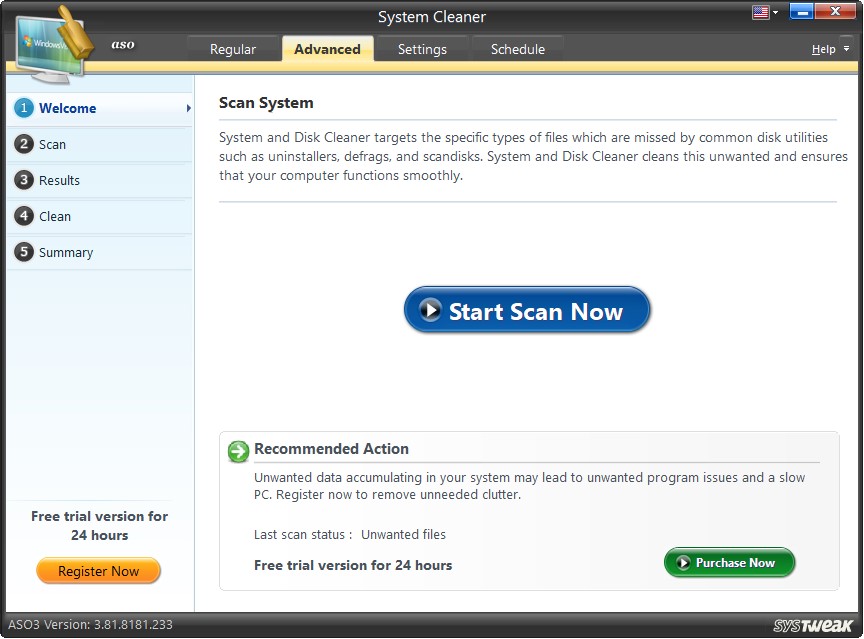
The Welcome screen directs us to initiate scanning in quite a self-explanatory manner. As you click the “Start Scan Now” button, System Cleaner scans the whole system, detecting junk files and folders occupying storage space.
Alongside, it shows the System Summary that tells about the Last Scan Date, Last Scan Results, Cleaning results, and the Next Scheduled Scan date and time.
Step2: Scan
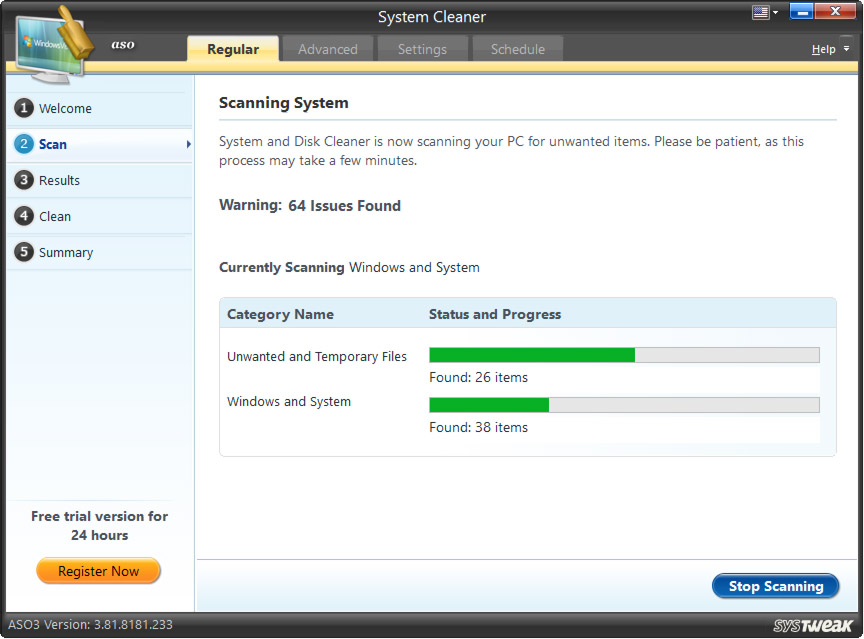
Scanning System
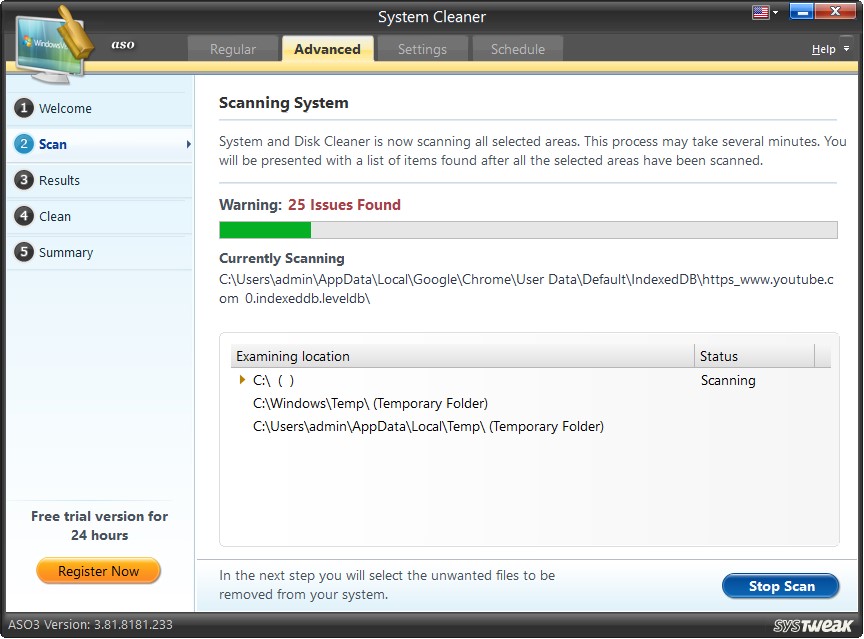
System Cleaner analyzes all the files and folders on the hard disk in a single click and detects obsolete data. The lower half of the screen shows the status of the areas being examined. By default, all the disk drives are included in the scanning, & this can be changed through the "Settings" tab.
Note: You can abort the scanning process anytime by clicking on the "Stop Scanning" button.
Step3: Results
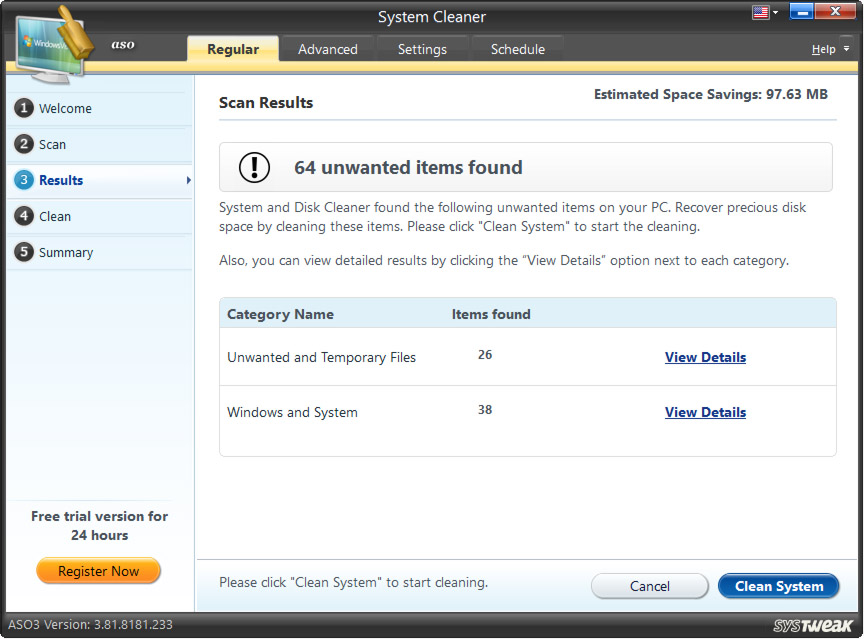
Scan Results
The results are classified under two main categories: "Unwanted and Temporary Files" and "Windows and System." You can click the View Details button next to each scan category to get detailed information about detected files.
- Unwanted and Temporary Files– These files are the remnants of browsing pages, uninstalled apps, etc., lying unused on the system's hard disk. Over time, these files pile up and cause fatal errors, thus consuming disk space needlessly.
- Windows and System Files –When new ones do not overwrite old Windows files and system settings, they create problems; hence, such files should be removed from the system.
In addition, to reduce file access time Windows creates temporary files, which get removed when an application is not in use. But when these temporary files are not removed after the app is closed, they clutter the system, thereby decreasing its performance.
To clean these detected junk files, you can click the "Clean System" button & get a clean disk without any unwanted files.
Step 4: Clean System
The disk cleaning of temporary files is done in 3 stages:
Creating Restore Point
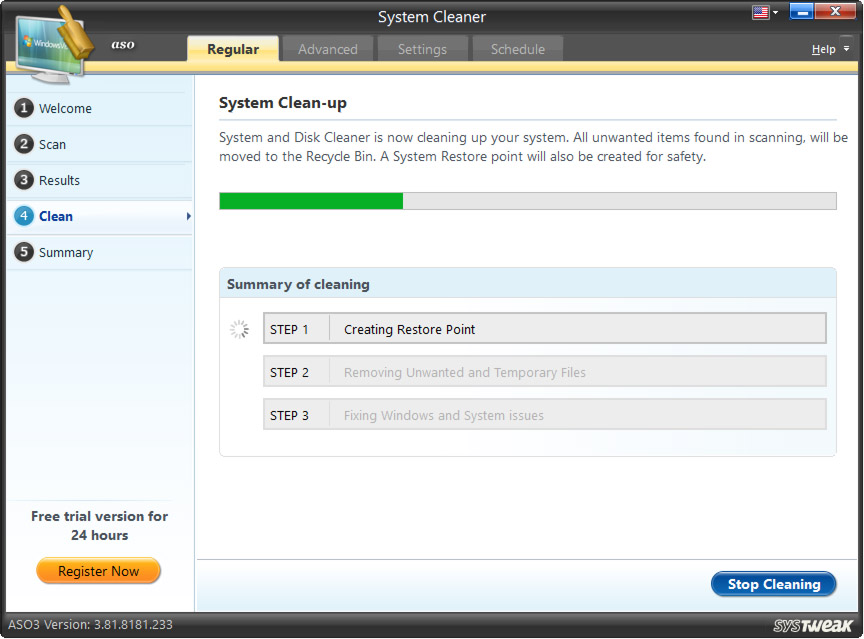
Before cleaning temporary files from the disk, a restore point is created. This is a precautionary measure so that if the user wants to restore these files can easily do so.
Removing temporary files
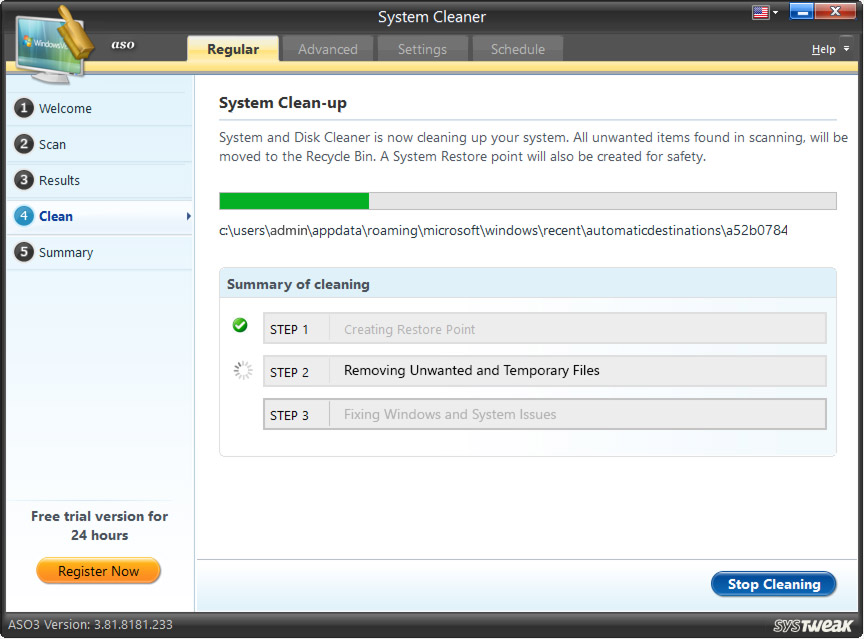
Once the restore point is created, System Cleaner removes unwanted and temporary files, followed by fixing Windows and System Issues:
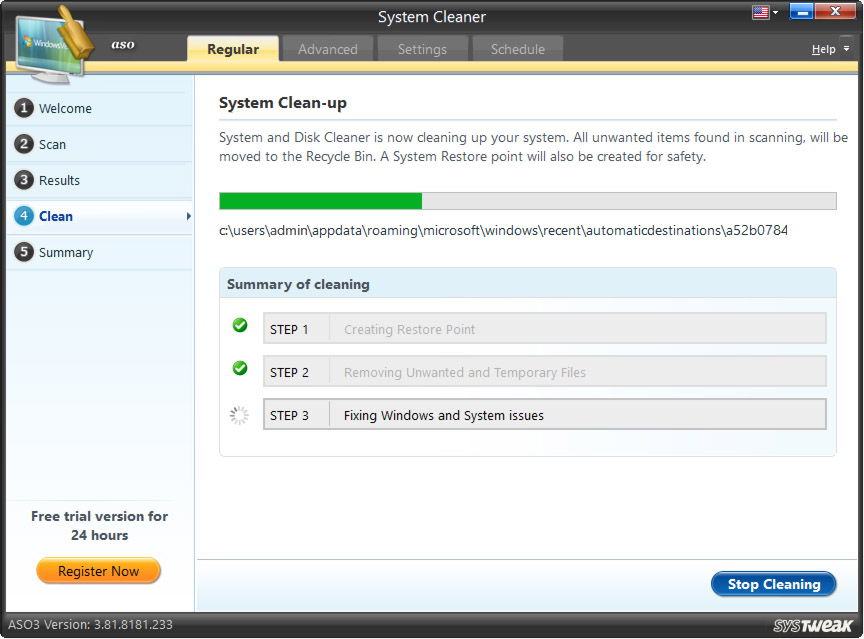
Note: You can abort the cleaning process by clicking on the "Stop Cleaning" button.
Step5: Summary
System Clean-up Summary
This is the last step of the disk cleaning process. Here, you see the system cleanup summary showing statistics of the total number of Unwanted files found, Files Cleaned, Issues remaining, and Disk space saved.
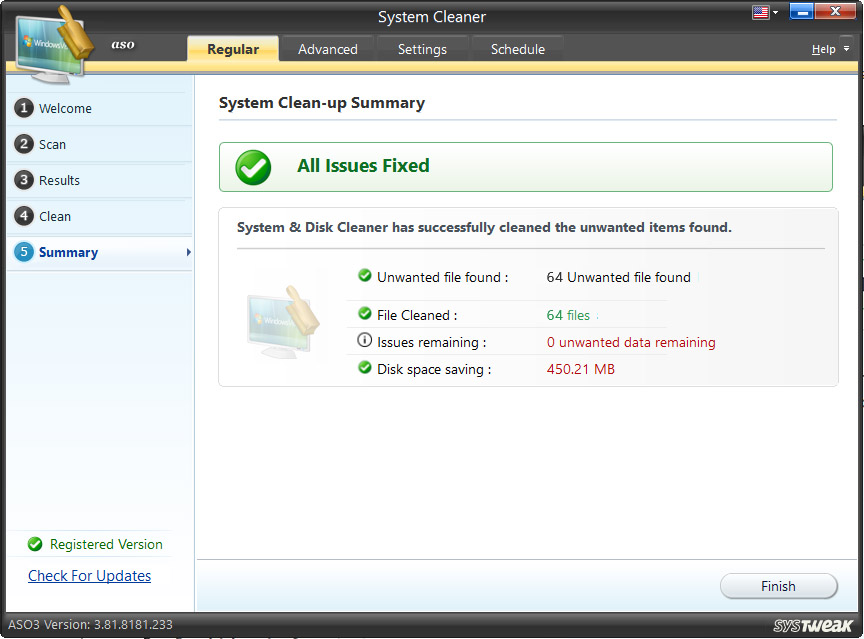
Next, to perform a thorough scanning and hit Advanced Tab.
Advanced Tab
As the name explains, the specific files missed in the Regular Scan are detected when you click the "Start Scan Now" button under Advanced Tab. In short, it is a more thorough scanning mode & it detects and cleans temporary files.
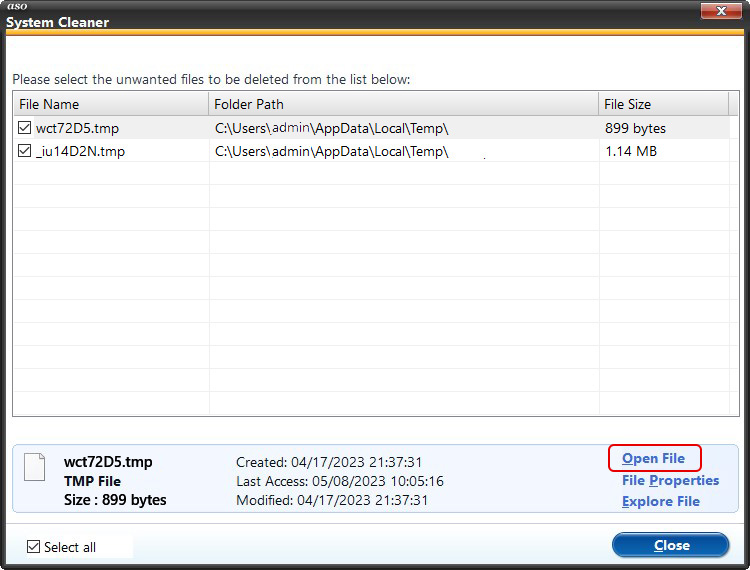
Temporary files stored in any location on the "C:\" are scanned during this process. The same is evident in the screenshot below:
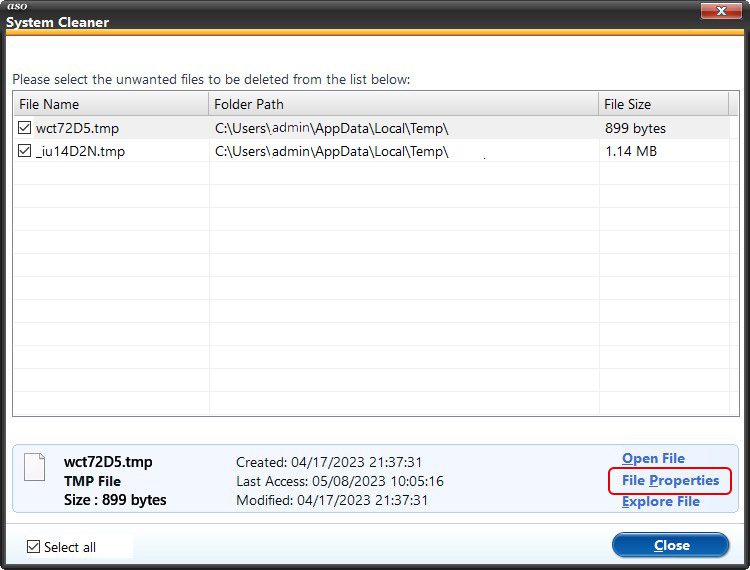
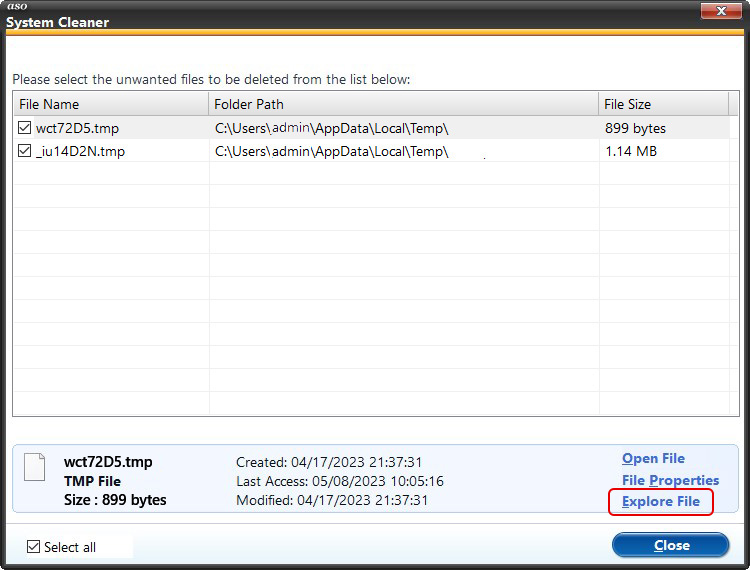
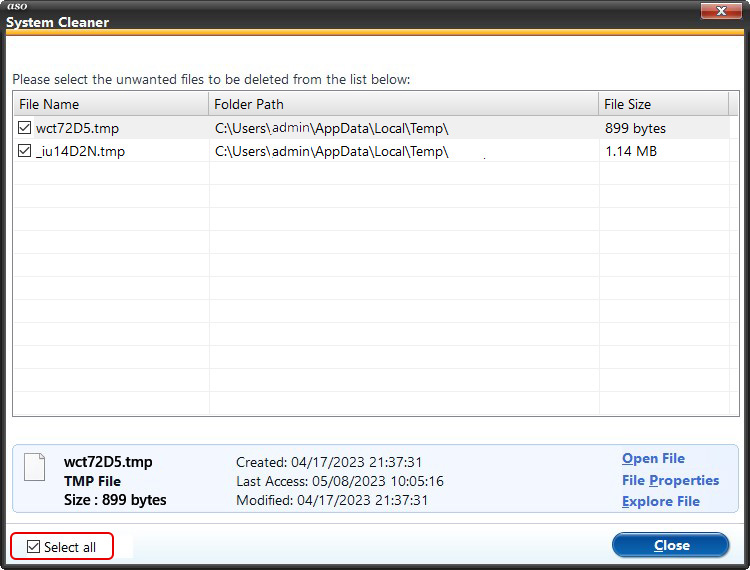
Scan Results - Get details about the files detected as Unwanted, Temporary, and Zero sizes.
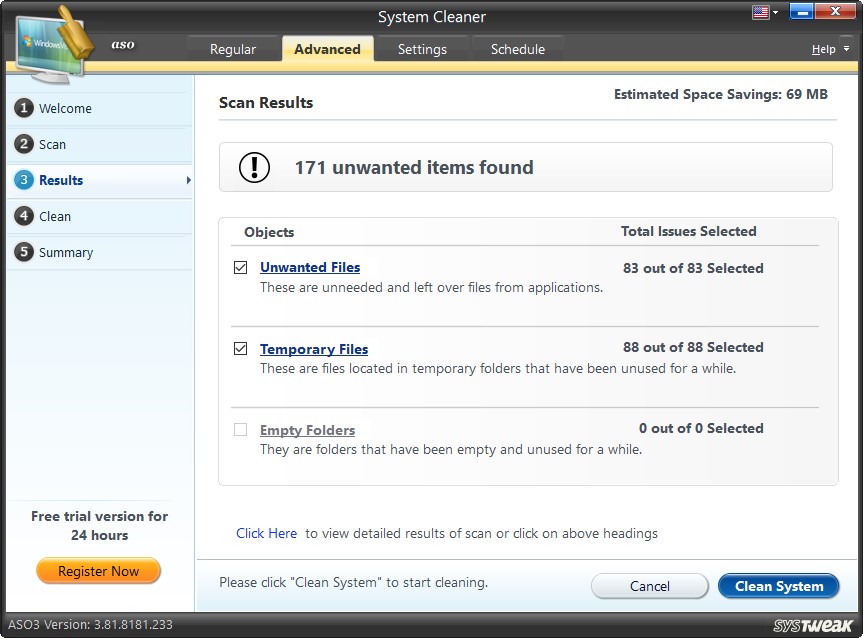
Click Here -Detailed information about scan results and the location of the detected files.

Open File - Access the selected file.

File Properties - Check the details of the selected file.

Explore File - Know more about the selected file.

Select All - Select all the scanned files.
Settings Tab
A few settings are already set under this section for fetching the best results. But they can be altered as per user preferences. There are three options displayed in the left panel for this purpose.
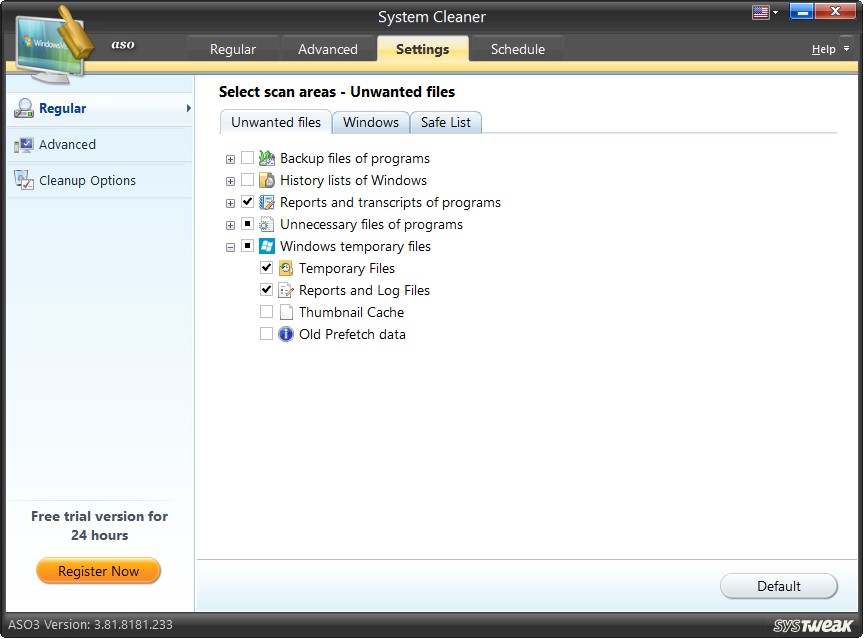
Regular -To give users complete control, this section is further divided into three tabs:
Unwanted files -here, you can backup files, history lists, program reports, unnecessary files, and Windows temporary files. To view what is detected under each section, click the + and unhide all the detections.

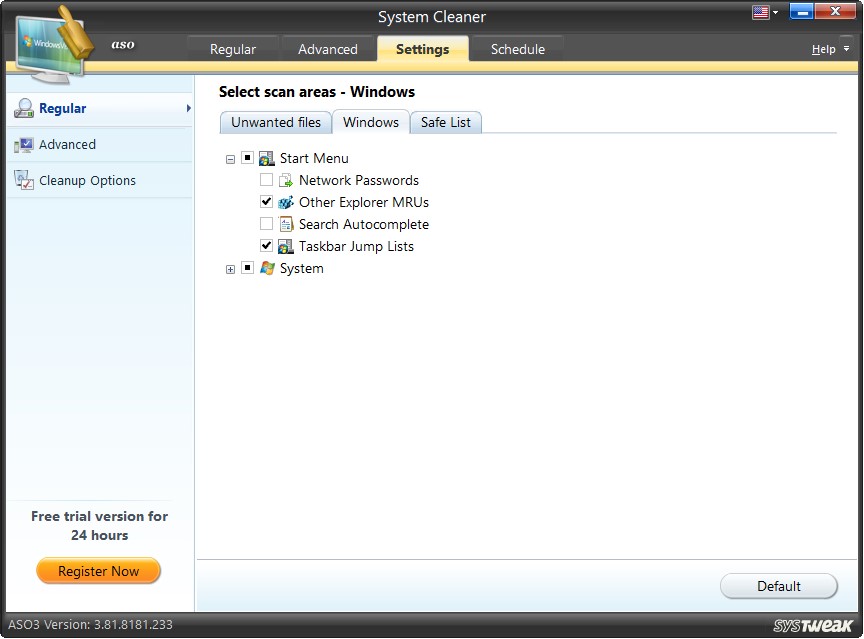
Windows -here, you will see junk data related to Start Menu and System.
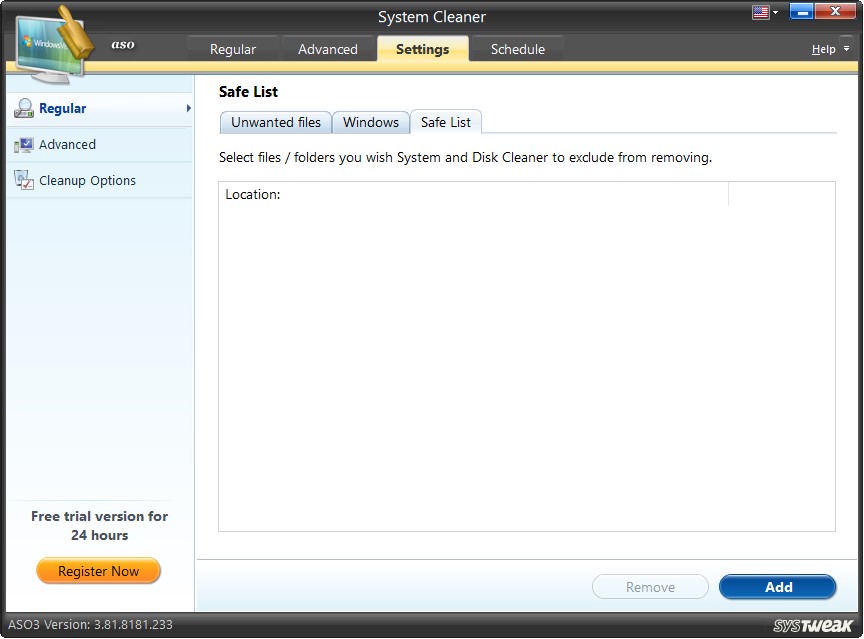
Safe List-If you don't want a specific file/folder to be scanned, you can add it to the Safe List.
You can select which areas to scan and which to skip by clicking each tab.
Advanced
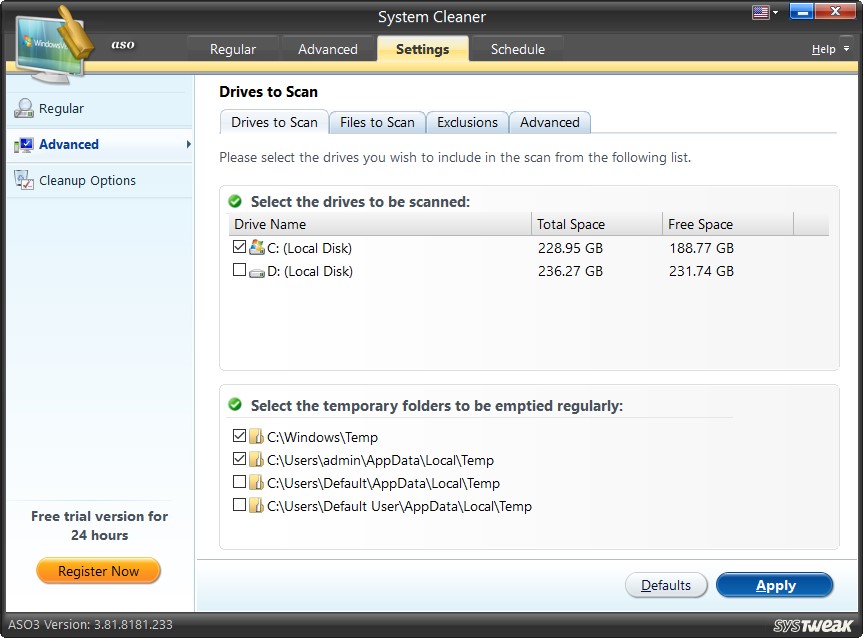
Drives to Scan
Drives to be Scanned and Temporary Folders to be Emptied
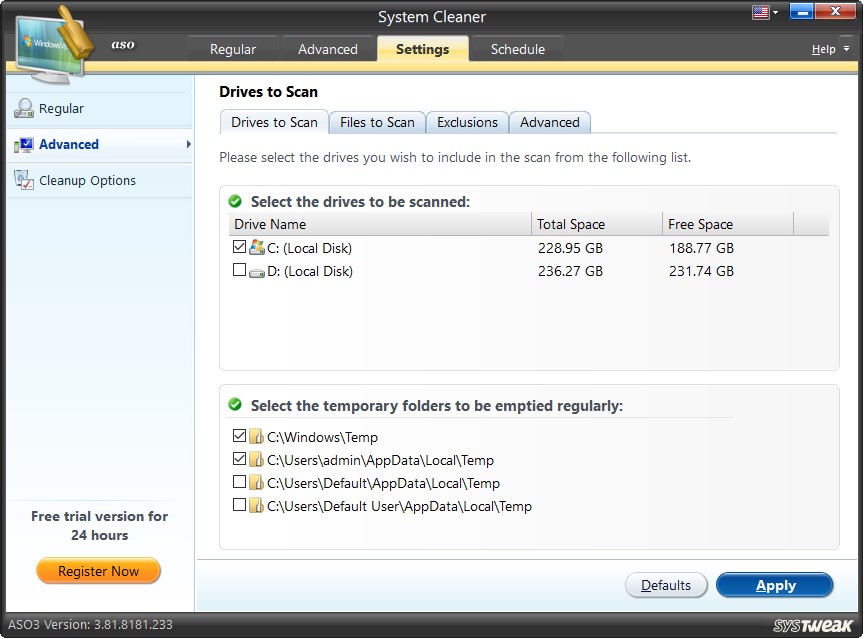
A scan can be customized by limiting the scan to specific drives or choosing all the drives together. The drives selected for scanning can be checked from the provided list.
Furthermore, you can select the temporary folders on the system which should be emptied during the cleaning process.
The "Defaults" button is provided to restore the default settings. The "Apply" button helps to apply all the changes done in the settings.
Files to Scan
Types of Files to be Scanned
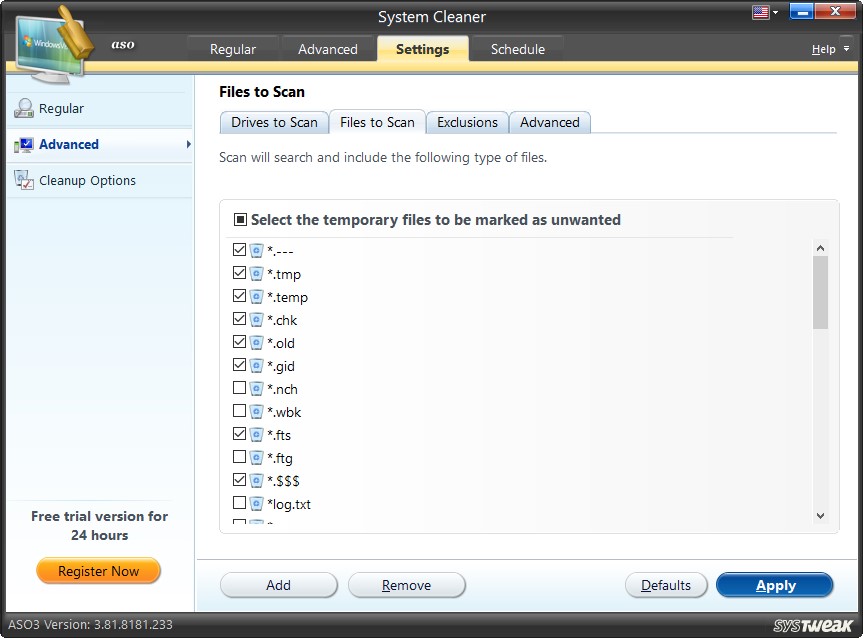
Files are distinguished by their file extensions. This section shows a list of file extensions that you can scan. The ones with a check mark against them are included in the scanning. To select others, simply check the box next to it.
Moreover, you can add or remove file extensions from the list using the "Add" and "Remove" buttons.
The "Defaults" button restores default settings. Before resetting the default settings, the user is asked to confirm the action. You may click "Yes" to continue and "No" to discard the action. The "Apply" button lets you save the changes done by you in the settings.
Exclusions
Exclude Files and Folders
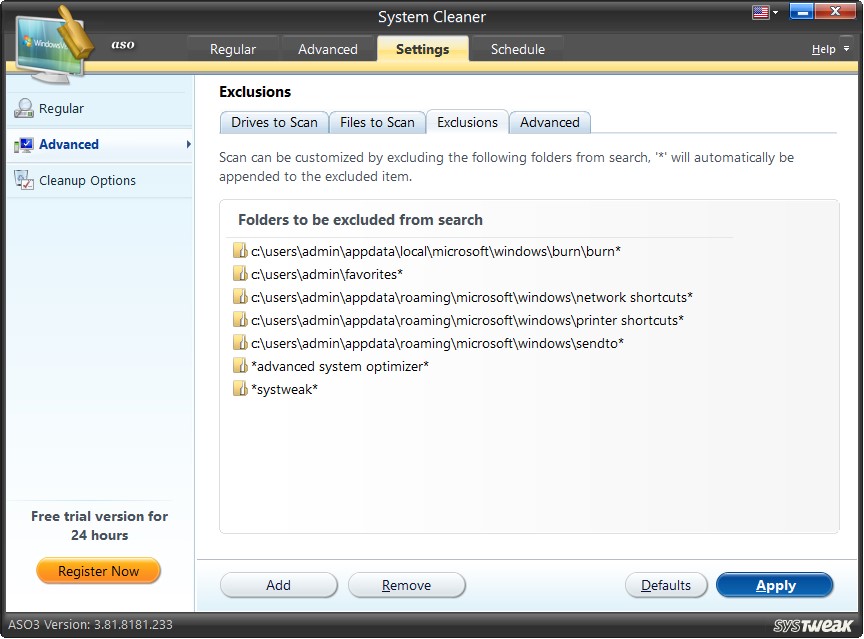
Files and folders you do not wish to scan can be added to the Exclusion List. The items specified in this list will be skipped. To exclude a folder from scanning, click the "Add" button; click the "Remove" button to delete added files.
Clicking the "Add" button opens a new window, and you can browse through Windows Explorer to insert items to the Exclusion List. To close the window, you may click on the “Cancel” button.
The "Defaults" button restores the default settings.
Advanced
Advanced Settings
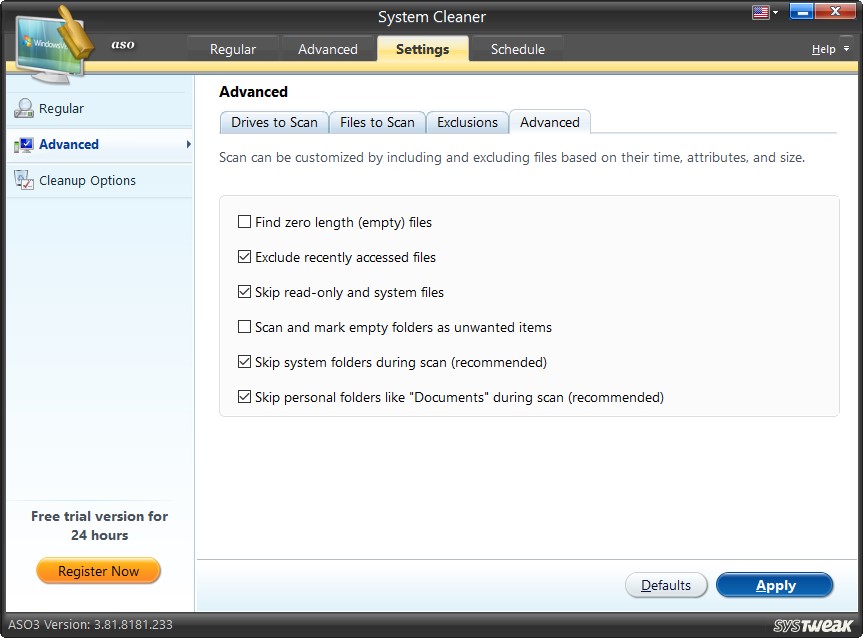
To make the scanning process well-defined and more specific, Advanced Settings give six options. You can either include or exclude files from the search by selecting them.
Find zero-length (empty) files – Zero-length files, popularly known as empty files, contain no data. These files are unneeded; cleaning this unnecessary data is recommended to clean the disk and recover disk space.
Exclude recently accessed files –-This option, when selected, skips recently accessed files and documents from the scanning process and will not be pointed out as junk.
Skip read-only and system files –Read-only files are non-editable, meaning they cannot be overwritten, nor are any changes possible to inhibit user interference. Hence, check this option if you don’t want to exclude read-only files and system files from the search.
Scan and mark empty folders as junk items –The folders containing no files are empty. These empty folders will be included in the search and marked as junk items. It is up to the user to delete or retain them.
Skip system folders during the scan (recommended) – Files are files created by the operating system to perform a few necessary functions. If you do not want to scan these files, check this option & exclude read-only files and system files from the search.
Skip personal folders like “Documents” during the scan (recommended) - Documents is the Windows default folder; if you do not want to scan files saved in it, check the option and exclude the Documents folder from being scanned.
The “Defaults” button allows you to reset the settings to default. Click the "Apply" button to save settings.
Cleanup Options
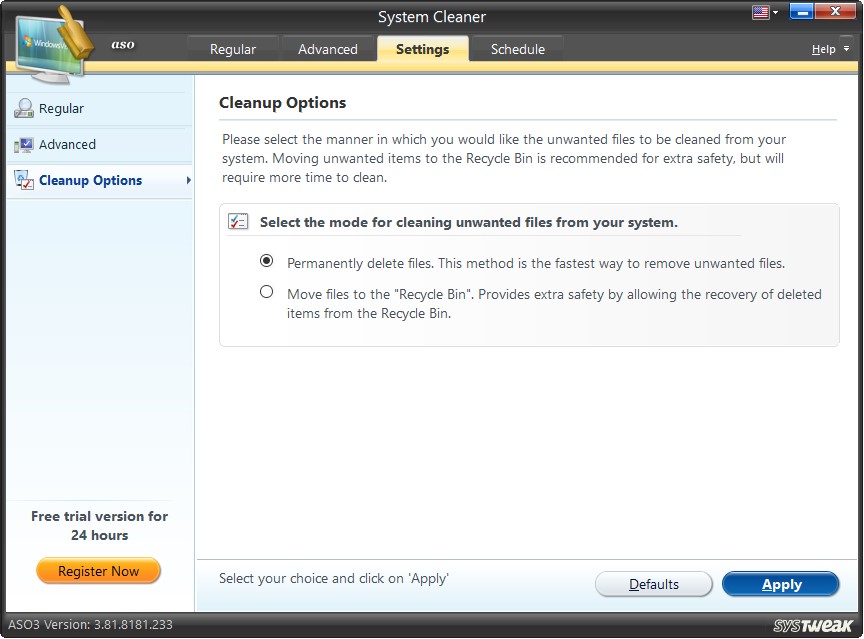
System Cleaner facilitates two cleaning modes. Either move deleted junk items to the Recycle Bin or permanently remove them from the system. You may select any one of them.
Modes of removal of junk items:
-
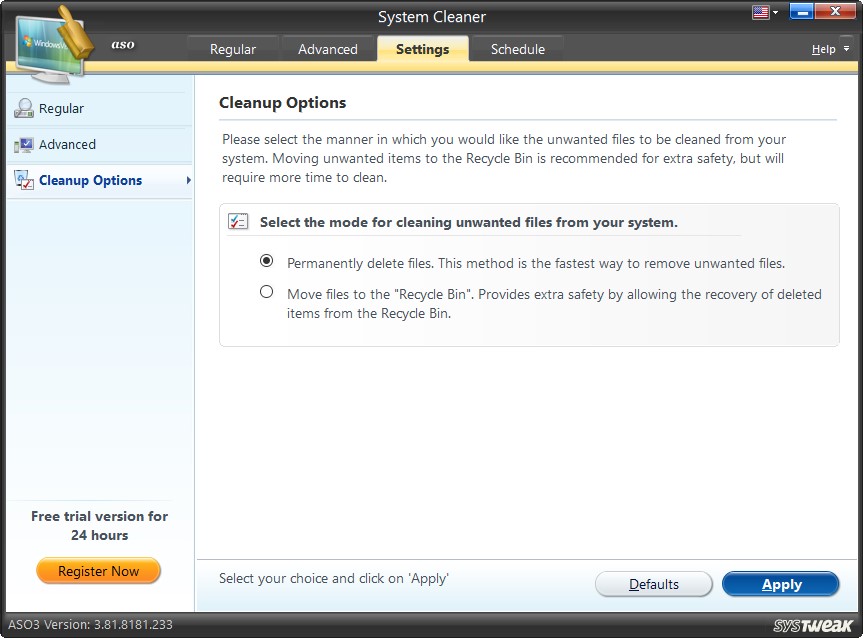
Permanently delete files –Junk items are permanently deleted from the system. This is a faster way of removing junk from the system.
-
Move files to Recycle Bin – This is a safer yet slower removal mode. Deleted Junk items are moved to the Recycle Bin instead of being permanently removed from the system. The junk items can be restored from the Recycle Bin if deemed necessary.
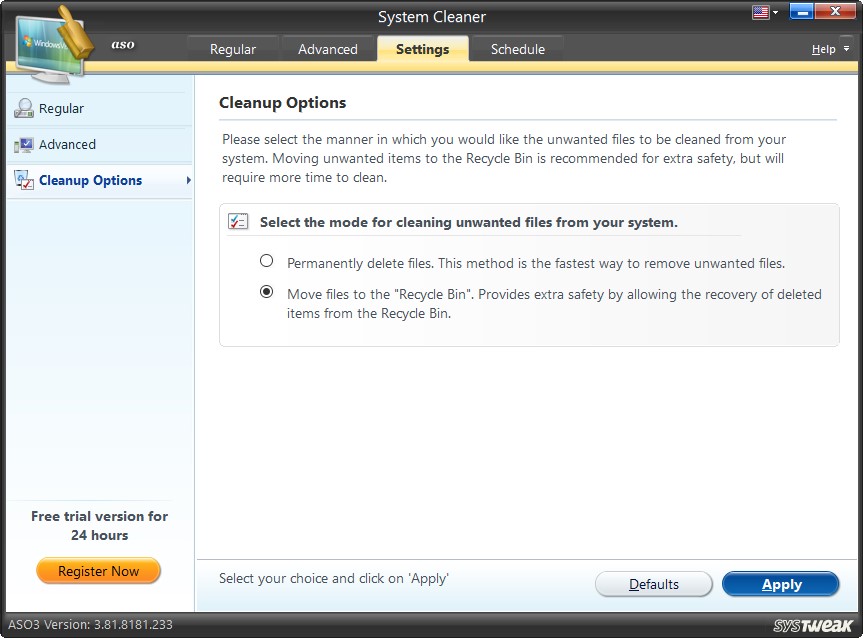
The "Defaults" button will allow you to reset the default settings and prompt you before it restores the defaults. The changes done in settings can be saved by clicking on the "Apply" button.
Schedule
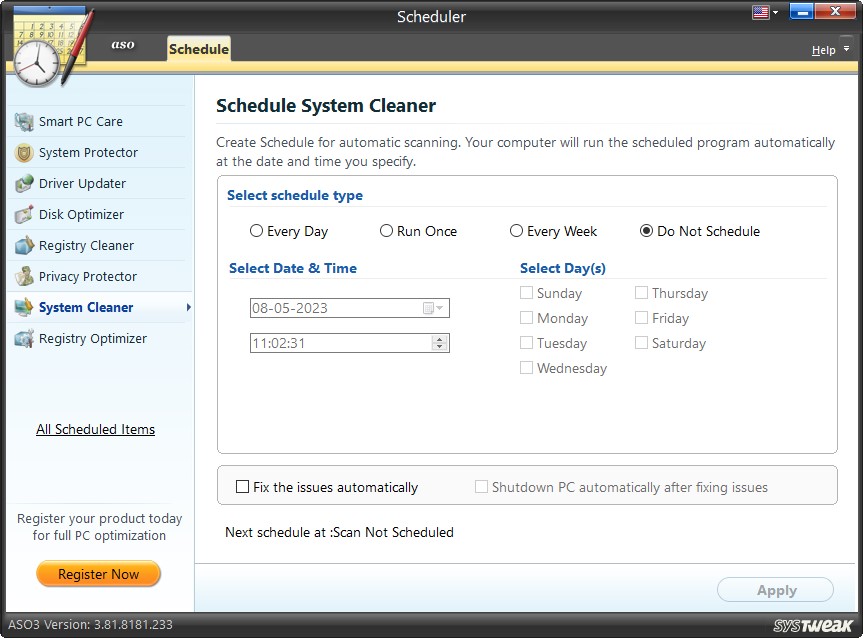
Create a schedule for automatic scanning and cleaning of junk files from the hard disk. Setting a schedule even when you are not around can clean the disk using this best disk cleanup for Windows.
What is Disk Optimizer?
Over time due to fragmentation in the file system, the PC begins to operate slowly. This decreases productivity and does not let you perform basic tasks. Defragmenting the disk in Windows 10 is recommended to troubleshoot this problem and speed up the PC's performance.
Luckily, an easy way to do it is using Disk Optimizer offered by Advanced System Optimizer.
What is hard disk fragmentation?
A hard Disk Drive, as we all know, is a system storage device that stores data in encoded form. Divided into different tracks, each track is further divided into other sectors; it gets fragmented over time. The data written on this disk is read back using the head arm.
During data storage, the head arm moves through the surface of the hard disk and finds free space to store the complete information in a sequential or linear format. The information is stored in a contiguous space when appropriate free space is available. This means that when the data is read back, the head arm does not have to rotate too many times to locate the complete information.
But in the absence of a continuous free space, the data is stored in bits and pieces. In such a scenario, while the information is read back, the head arm has to read the scattered information from various locations rotating more than once. This increases the data access time, consequently affecting speed and performance.
What causes disk fragmentation?
When the data is stored disorganized and unsystematic, disk fragmentation occurs. This happens when there is a need for more contiguous (continuous or linear) space to be allocated. Due to this, the system takes more time to read the fragmented data back from the hard disk.
Fragmentation is caused basically because of: -
-
Less free space
Whenever sufficient free space is unavailable to store the complete information, the storage is done in parts on the hard disk.
-
Frequent deletions
Often the unwanted data is deleted from the hard disk. In this process, gaps are left in between fragmenting the hard disk.
-
Extension of Files
Additions made to the already stored files may be stored in a different sequence on the hard disk with enough space. Usually, in such a case, the system creates an extension of the file and stores it elsewhere.
-
Moving of Data
There can be instances when data is moved to a new location, and there isn’t enough space to store the data in totality. The information is then stored in pieces on the hard disk.
How to defrag disk on Windows?
The hard disk is in constant use as we store data and information. In addition, randomly deleting and uninstalling files leave small chunks of free spaces behind. These small areas of free space are spread out throughout the hard disk, and contiguous space is unavailable for new files to be stored. In such a scenario, the system must store the data on available small chunks of free space. Due to this, the data read time increases, and the system becomes unresponsive.
Information: Fragmentation causes system slowdown, slow startups and shutdowns, low hard disk storage efficiency, and declining performance.
To help deal with this problem, Disk Optimizer is offered by Advanced System Optimizer. It helps remove all the fragments from the hard disk and puts small chunks of free space together. This helps defrag the disk and create free space that can be used for more efficient and better storage purposes. The scattered data is also brought together so that it can be accessed faster from the area it has been stored sequentially.
In short, Disk Optimizer is created to defrag Windows 11, 10, 8, and other versions of Windows operating systems.
To defragment the disk on Windows, follow the instructions given below:
- Launch Advanced System Optimizer
- Click Disk Cleaner & Optimizers > Disk Optimizer
This will open a new window simplified into 5 steps:
- Welcome
- Scan
- Results
- Optimizing
- Finish
Step1: Welcome
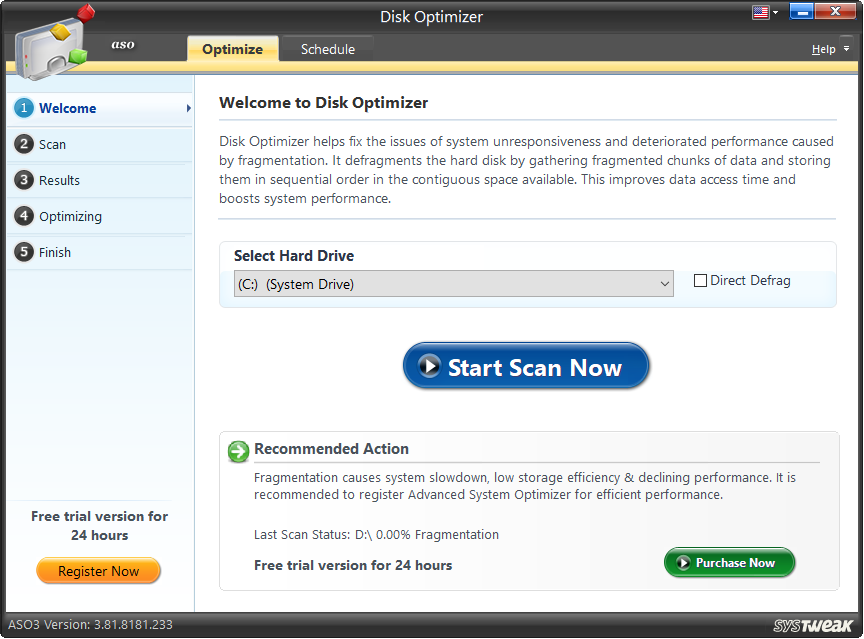
On the Welcome screen, you will find a dropdown menu under the section "Select Hard Drive," from where a drive has to be selected to initiate scanning.
You may click on "Start Scan Now" to start the scan on the selected drive.
Direct Defrag

You may also 'check' this option to skip the disk analysis and directly start the defragmentation process for the selected drive. This will take you to the fourth step (Optimizing) without showing you the scan results and defrag the selected disk.
Step2: Scan
The next step shows the scanning progress of the selected drive.
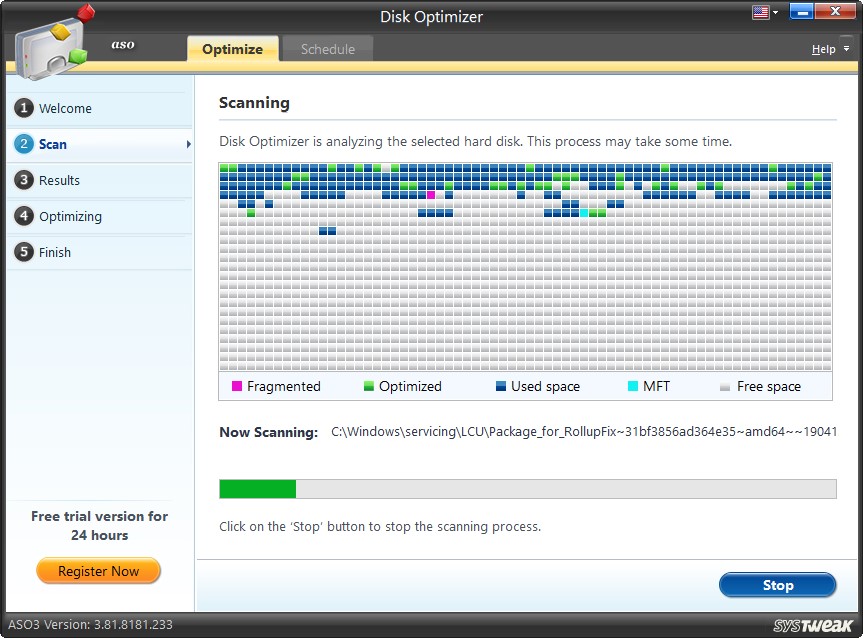
Each drive comprises several sectors, and each sector is analyzed extensively by the Disk Optimizer. The graph shows the actual status of the hard disk. You may refer to the legend under the graph for a better understanding.
Explanation of terms used:
- Fragmented –Refers to the data stored in various locations on a hard disk, i.e., fragmented. Disk Optimizer defragments the data for faster data access.
- Optimized –Refers to the data on the hard disk that is not scattered and is saved in one contiguous space.
- Used Space –Refers to the space pre-designated by the system to store important files. Disk Optimizer detects fragments in the allocated space and removes them.
- MFT – Refers to the Master File Table in which the information of every file and directory is stored with its attributes. It is always good if the MFT is stored in the hard disk in a contiguous space. The search for any information or file will then be faster. Disk Optimizer defragments the scattered MFT.
- Free space – Refers to the space on the hard disk, which stores no data and can be used for storage purposes. Disk Optimizer puts together all the scattered chunks of free space in one place on the disk.
You may click on the "Stop" button anytime to stop the scanning process.
Step3: Results
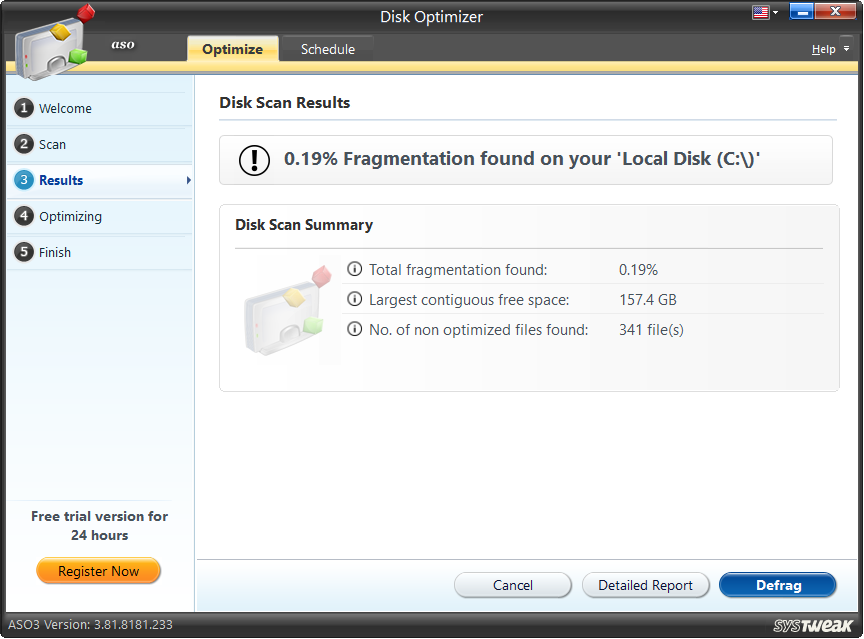
Once the scanning is through, a scan summary is exhibited. Approximate figures for the volume of the hard disk found to be fragmented, several files found to be fragmented (non-optimized), and the current largest volume of contiguous space found on the hard disk are displayed. Also, you will be guided on whether defragging is needed or not.
Note: For better system performance, defragging the hard disk is recommended.
On clicking on the "Detailed Report," the disk scanning report can be viewed in detail.
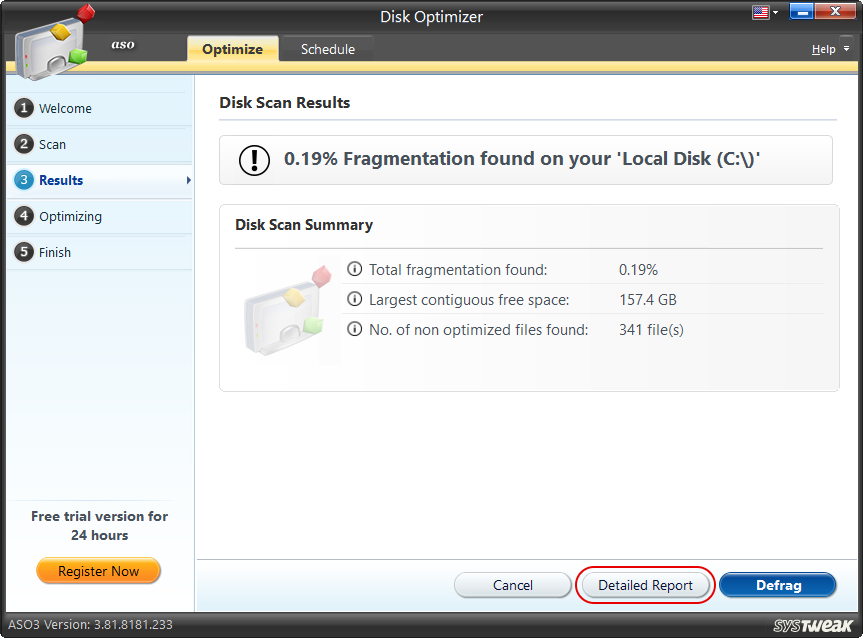
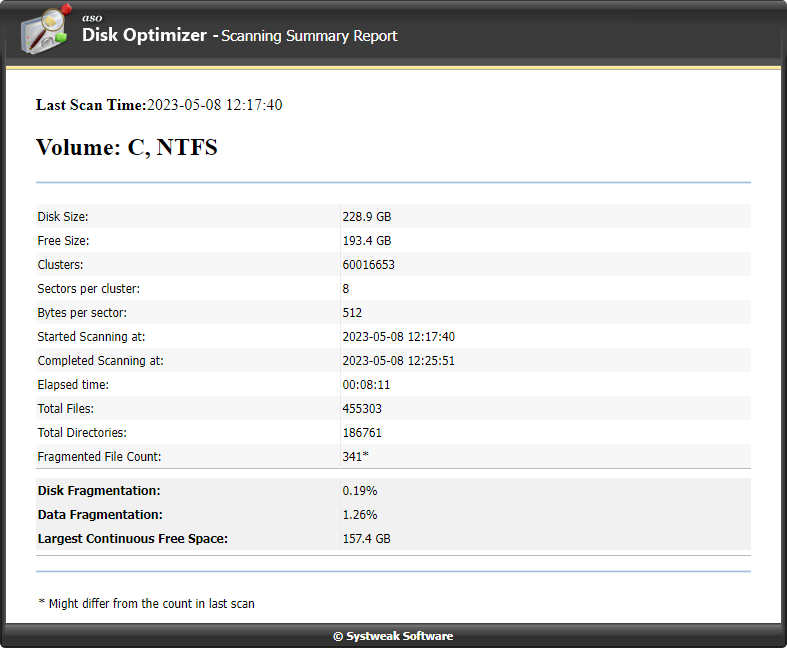
The data fragmented on the hard disk adversely affects the system’s performance, which should be taken care of on time. Clicking the "Defrag" button will defrag the disk data and improve data access time.
On clicking on the "Cancel" button, you may move back to the Welcome screen and scan another drive for fragmentation.
Step4: Optimizing
Disk Optimizer starts the actual process of defragmentation by clicking on the “Defrag” button. During this process, the small chunks of free space are put together to create a larger chunk of free space for better and more efficient data storage. Also, the scattered data is brought together and saved in one contiguous space on the disk. This process takes some time to complete.
The defragmentation process can be stopped anytime by clicking on the “Stop Defrag” button in the lower right corner.
Step5: Finish
The last step shows the comparative analysis of the disk optimization process, i.e., disk fragmentation before and after optimization, data fragmentation before and after optimization, and the largest volume of contiguous space available for storage before and after optimization.
To view the complete details of the defragmentation process, you may click on the "Display Report" button. This will open a web-based report showing all the minute details of the optimization.
To start the process of defragmentation for other drives, you may click on the "Finish" button and return to the Welcome screen.
Schedule Tab
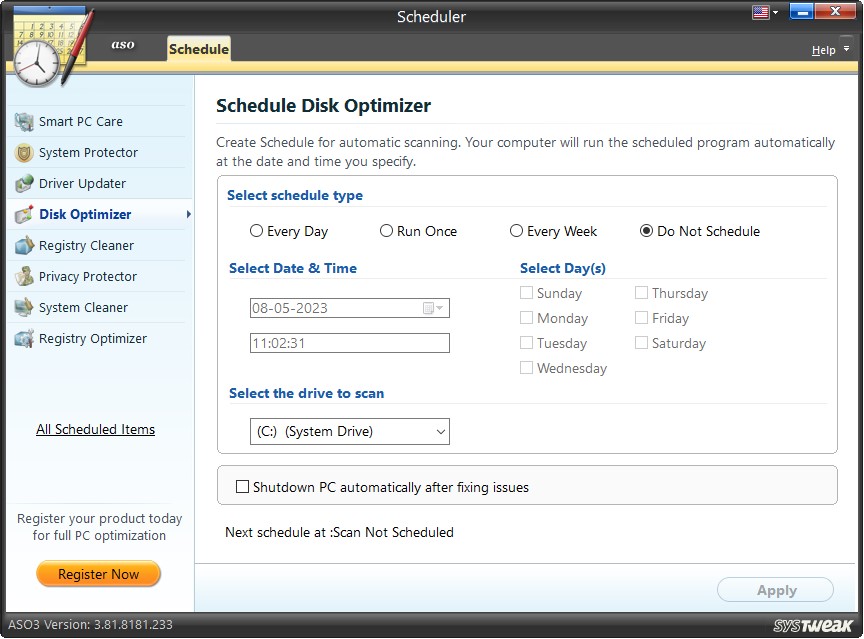
Disk Optimization is regularly recommended. The scheduler facilitates scheduling the process of defragmentation for your hard disk. The scan starts automatically on the predefined day, date, and time. This is a helpful mechanism as we skip this important task quite often.
Set the scan time by using the various options given.
Options to schedule scan:
Every time you schedule a scan, it is necessary to click on the "Apply" button to save the changes you have made.
The next scheduled scan is displayed at the bottom of the screen. You may also view all scheduled scans by clicking on the link "All Scheduled Items" in the left panel.
Disk Tools
Over time, as you use the PC, bad sectors accumulate on the hard disk, and the PC begins to operate slowly. This decreases Pc’s speed and processing. Therefore, checking the disk for errors is recommended to speed up the PC's performance.
An easy way to do it is using Disk Tools offered by Advanced System Optimizer. The module checks the disk for errors and shares information about disk health, temperature, read and write operation, and much more.
What is checking the disk for errors?
It means scanning the hard disk for errors and displaying the status report of the disk. When you run Disk Tools, it ensures all the information about the folders, data, and security status is correct, and no error might cause any trouble.
Generally, disk errors occur due to improper system shutdowns, failing hard drives, and file system issues caused by malware infections. Disk Tools checks for these errors and helps fix them. Using it, you can fix system file issues and avoid the risk of disk damage.
How to Check Disk using Disk Tools?
- Launch Advanced System Optimizer.
- Click Disk Cleaner & Optimizers > Disk Tools.
This will open a new window divided into 4 tabs and 2 sections in the left pane.
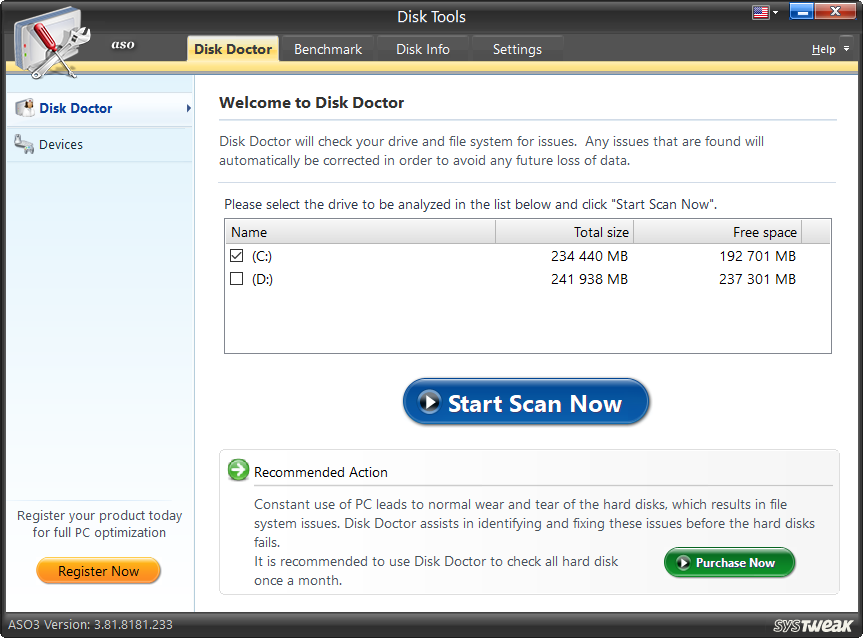
To initiate the scan, select the disk partition and click Start Scan Now button. Disk Tools will check the drive and system files for issues when the PC boots.
Devices Tab
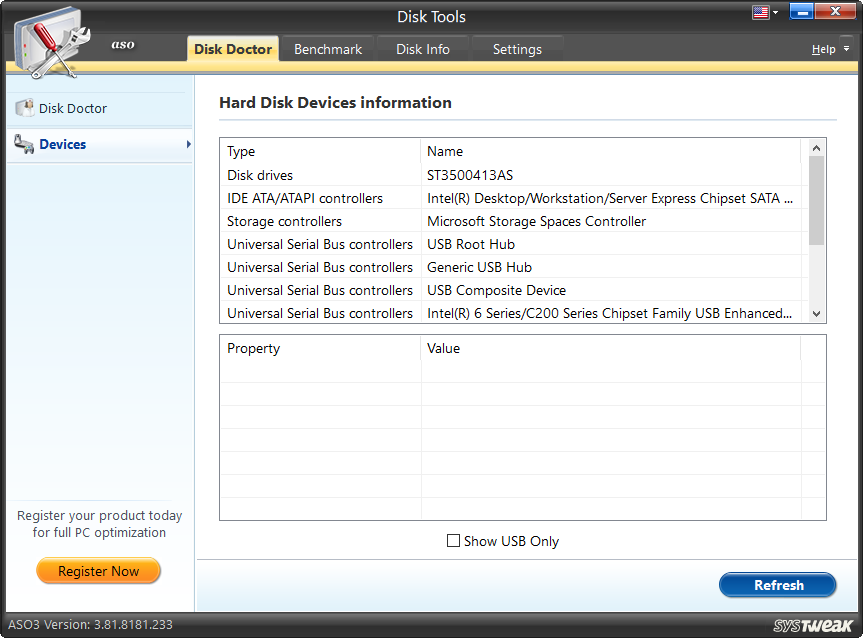
Clicking this tab gives information about the Hard Disk Drive and connected USB.
Benchmark
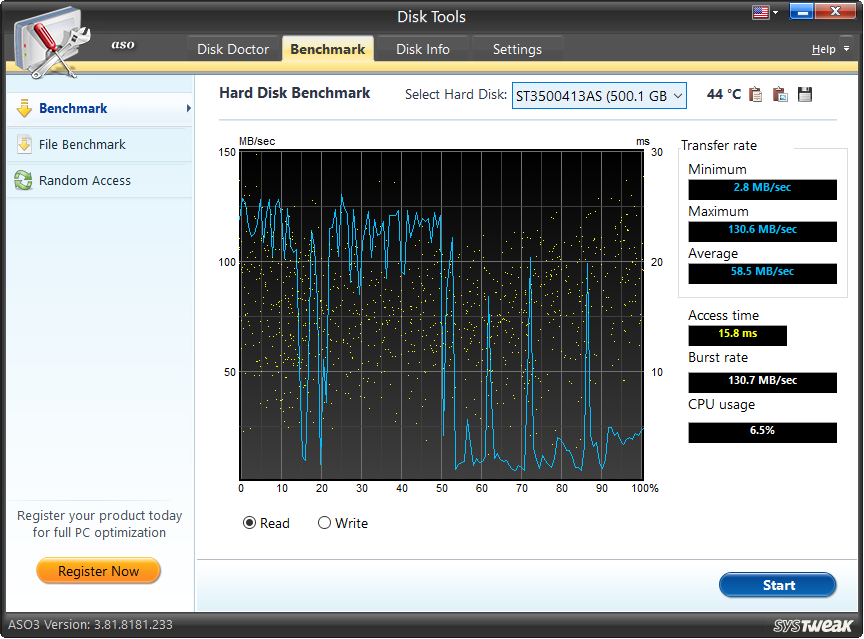
The second tab shows the disk temperature, read and write time, access time, burst rate, and CPU usage. To start the process, select the disk and click the Start button.
File Benchmark
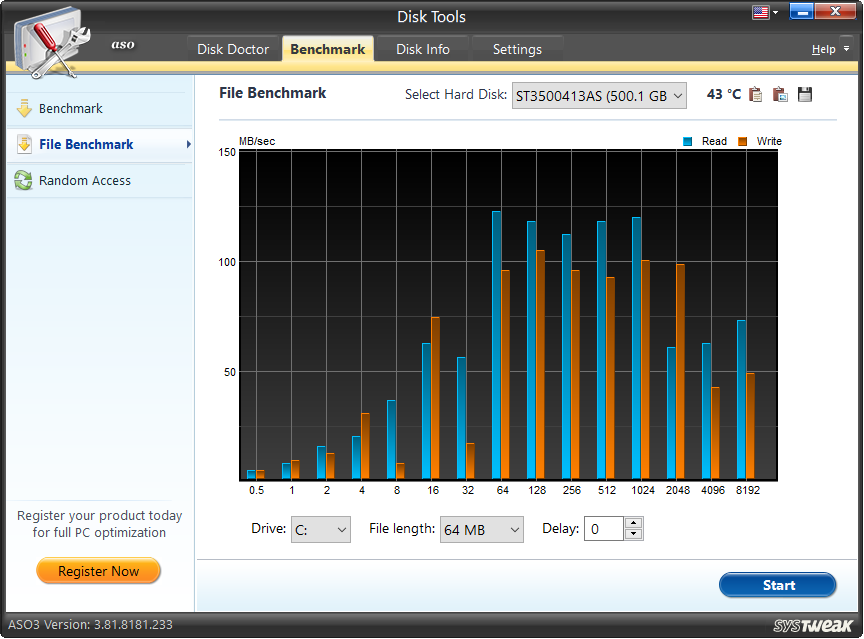
This section gives information about the hard disk, partition, file length, and more. To start the process, click the Start button.
Random Access
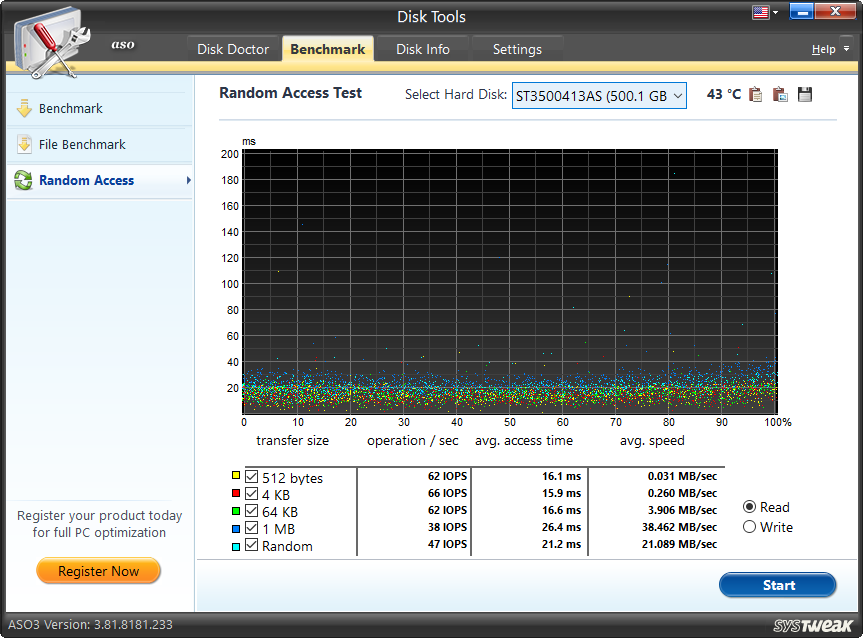
From this section, check the disk for read and write operation speed, time, and other information. To begin the process, click the Start button.
Disk Info
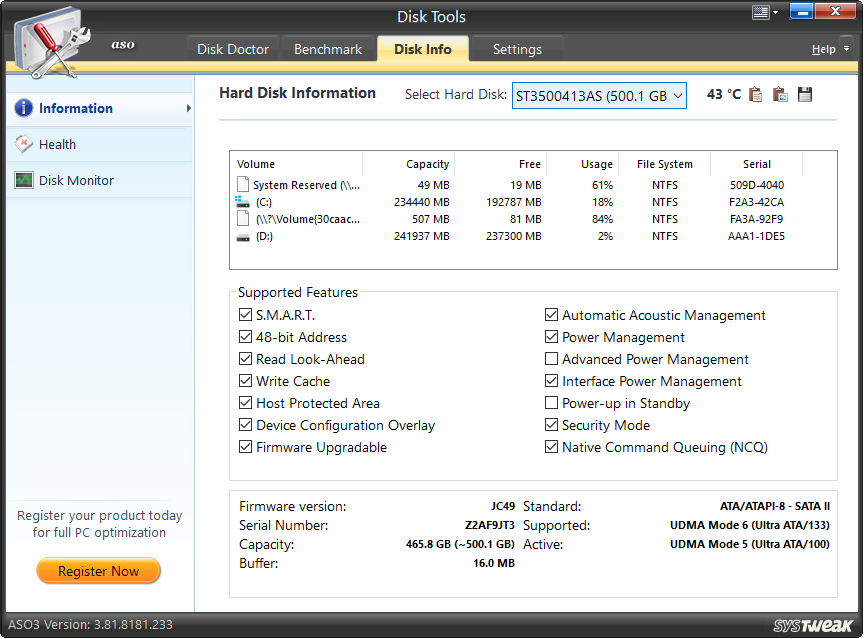
This section is divided into three tabs:
- Information - Here, you get complete information about the disk features, firmware version, serial number, and more. Select the disk, and you will get the details.
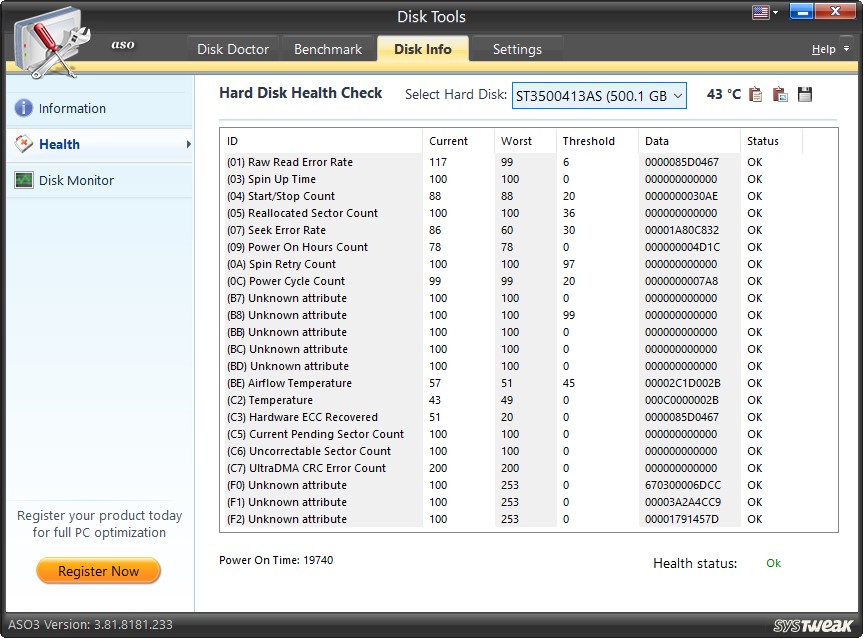
- Health - Want to learn about hard disk health? Click the Health section and collect all the information about the selected disk. Also, you can know the power on time.
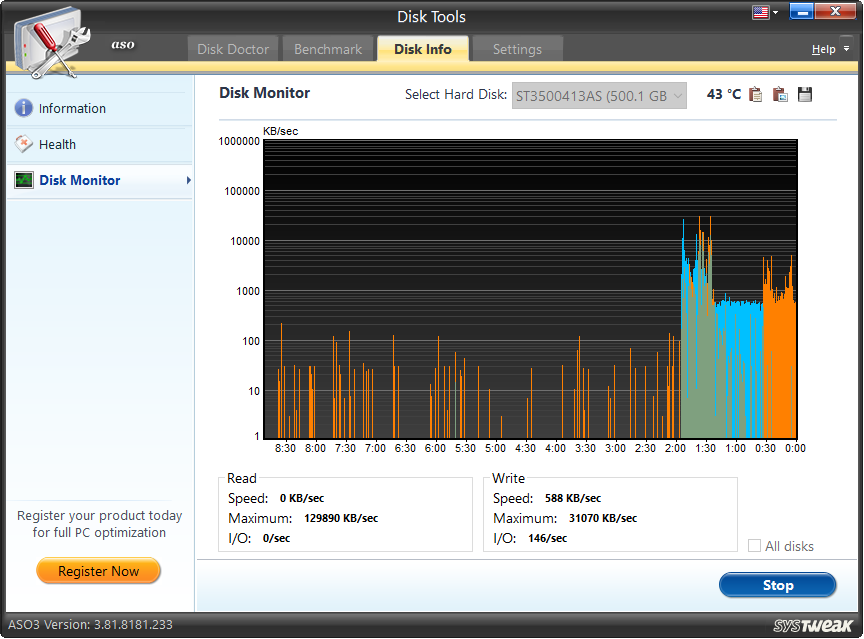
- Disk Monitor - This section allows monitoring disk and knowing about Read and Writes speed. Click the Start button to begin the process.
Settings
Through this section, customize how Disk Tools should work. Settings are further divided into three sections -
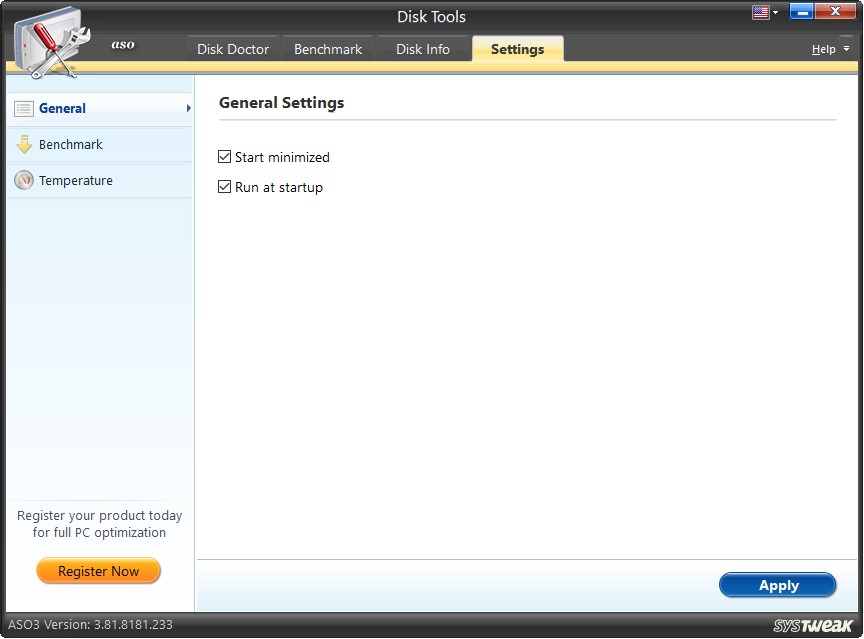
- General - Want to run perform disk check at startup check the box next to Run Startup. To run it minimized, click Start minimized and click Apply button.
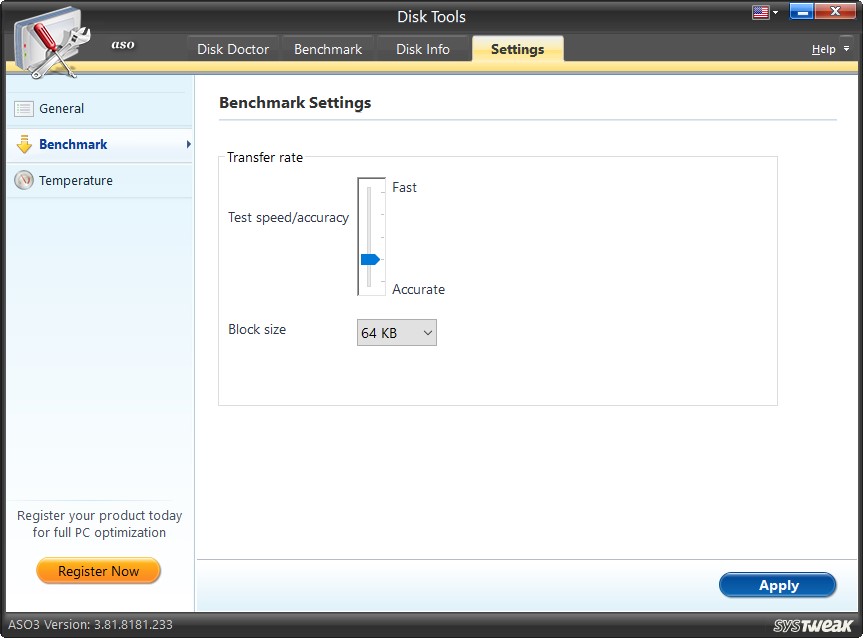
- Benchmark - using the slider, set the transfer rate speed/ accuracy and block size. To save changes click the Apply button.
- Temperature - To know about the disk temperature and stay alarmed when the temperature rises certain level, use this section. To save changes click Apply button.
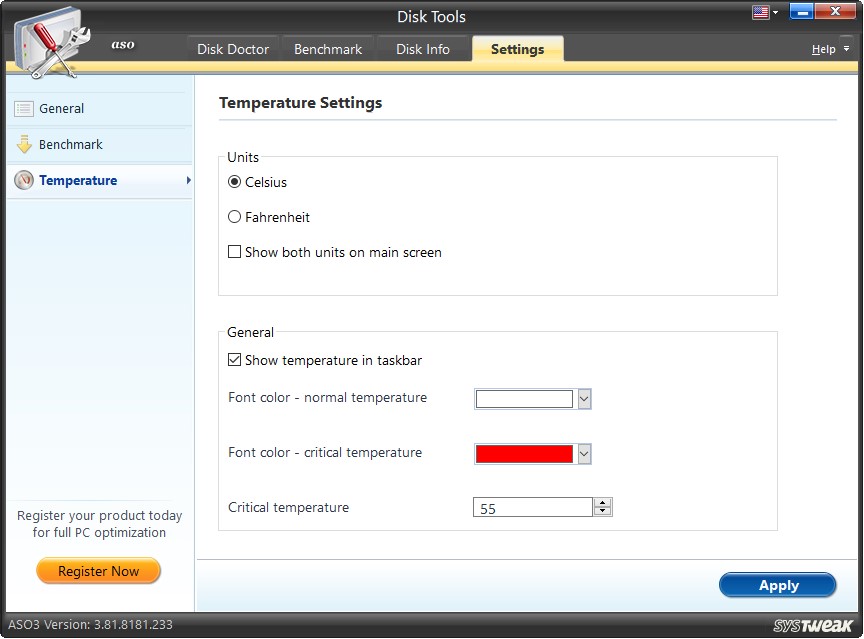
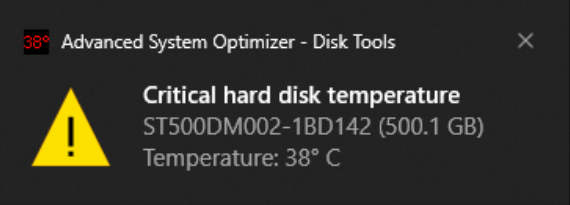
Temprature showing in taskbar as below:
Disk Explorer
With time, we keep storing different data types on the hard disk. Using the Disk Explorer section, you can scan each disk partition and collect information about the saved data. Also, you can which file types are taking the most disk space and get a list of the Top 100 files, this helps manage the storage space and get rid of files taking up unwanted space.
How to run Disk Explorer?
To run Disk Explorer, follow these steps:
- Launch Advanced System Optimizer.
- Click Disk Cleaner & Optimizers > Disk Explorer.
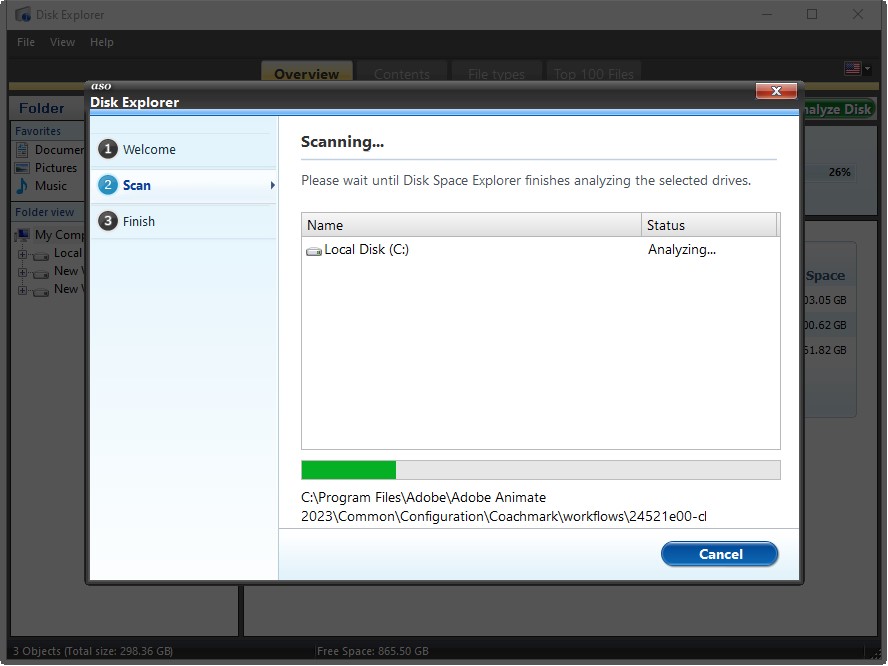
- Select the disk you want to scan and click the "Start Scan" button.
- Wait for the operating to perform.
- When done, click Finish to get detailed information divided into different sections.
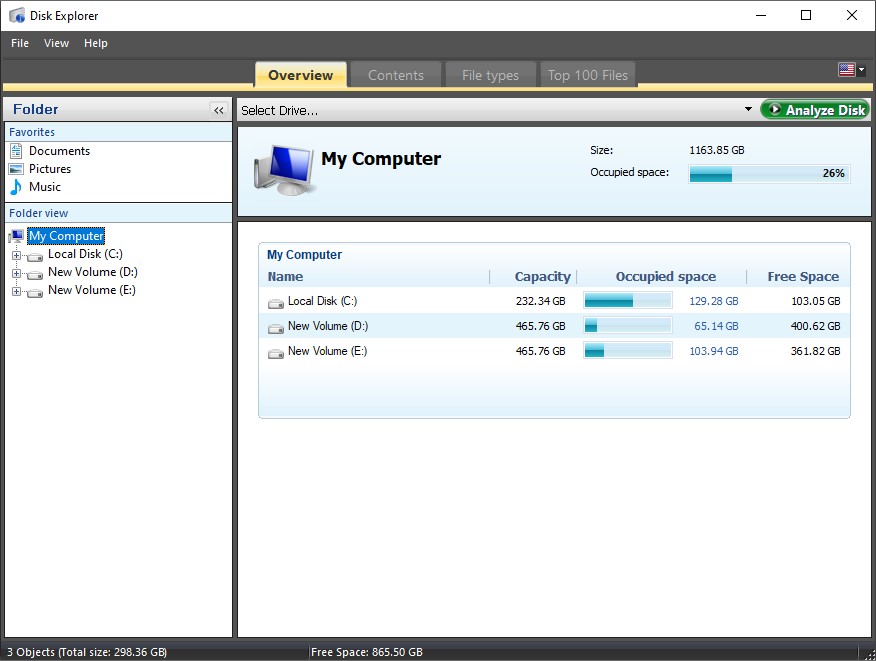

Overview - You will get information on drive capacity, occupied space, and free space graphically and in a bar.

Contents - displays details by disk contents divided into partitions.
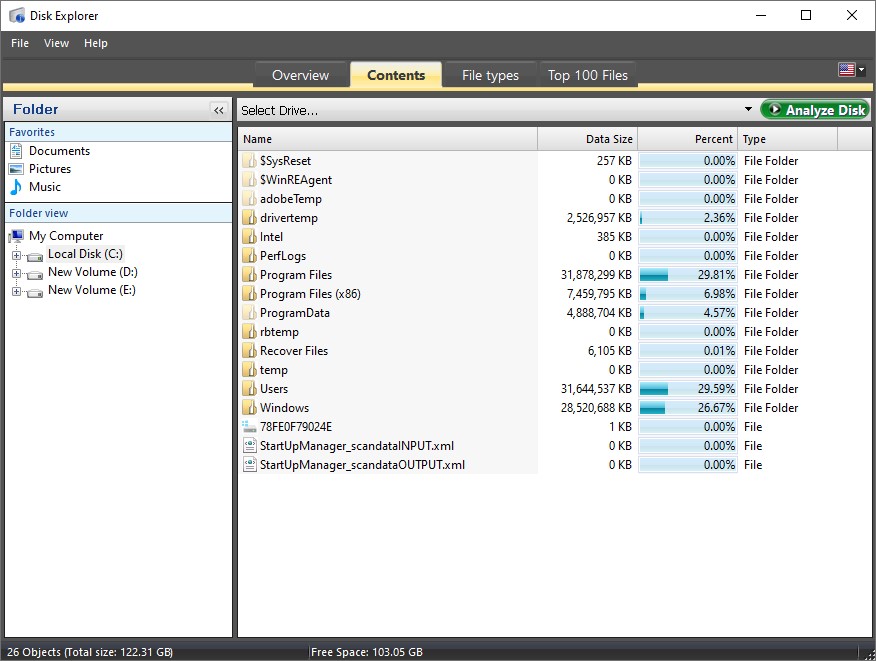
To analyze the disk further, click Analyze Disk.
File Types - Graphically presents different data types and shows the percentage of space occupied.
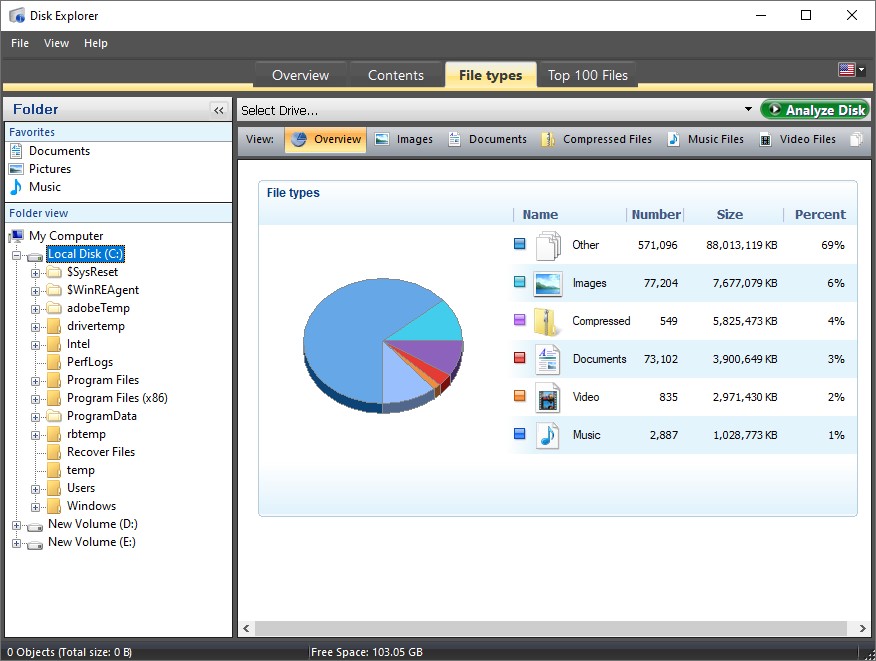
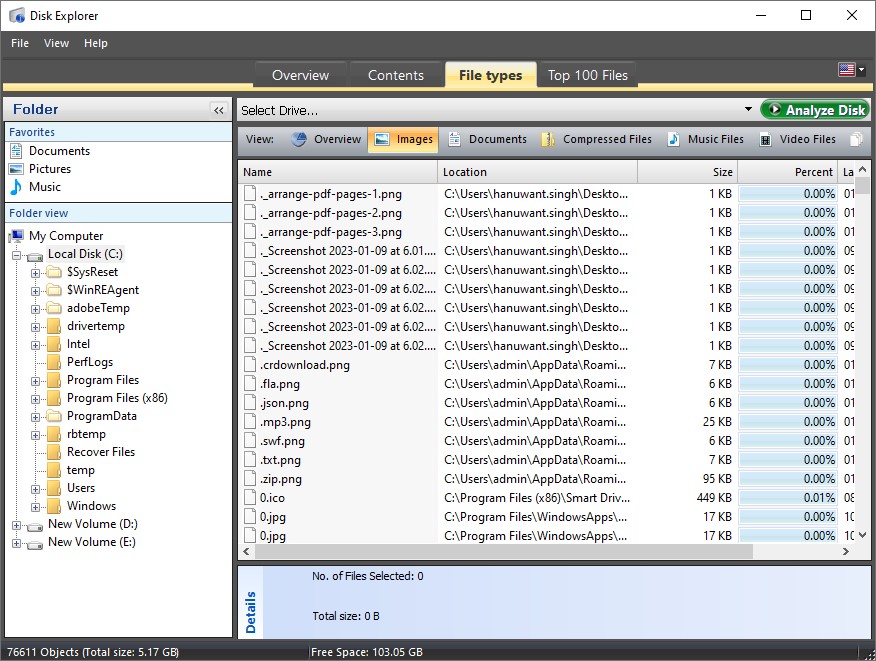
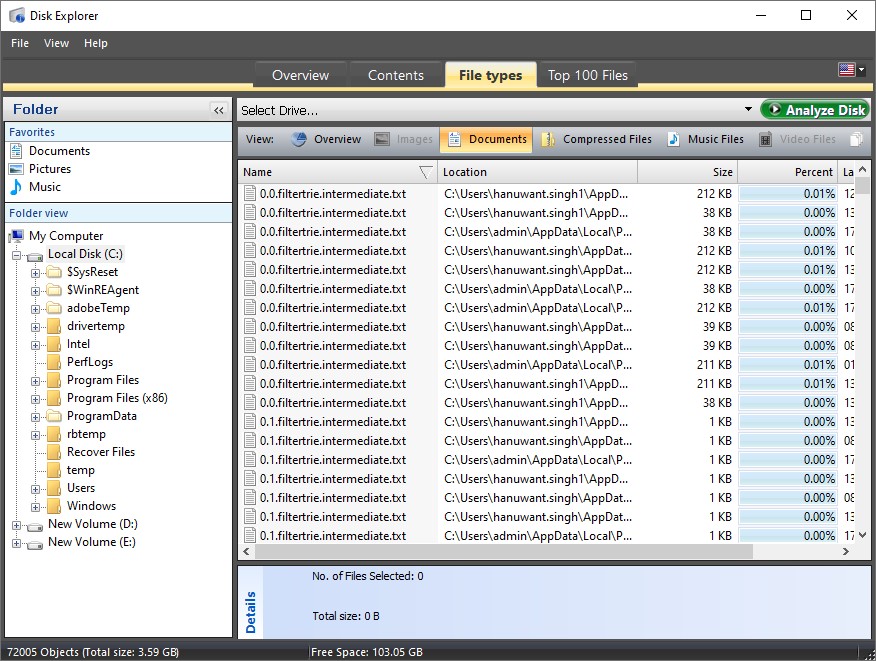
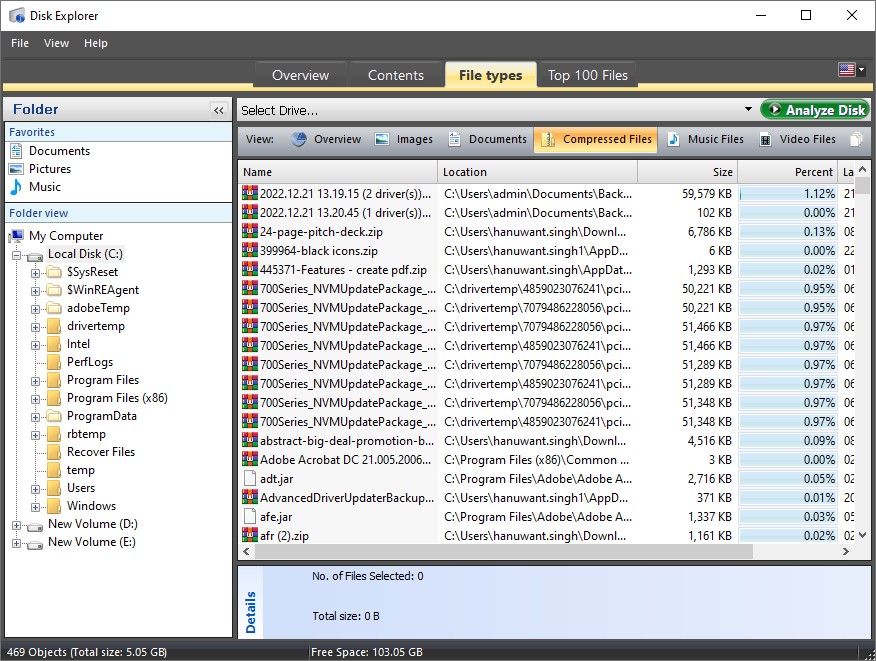

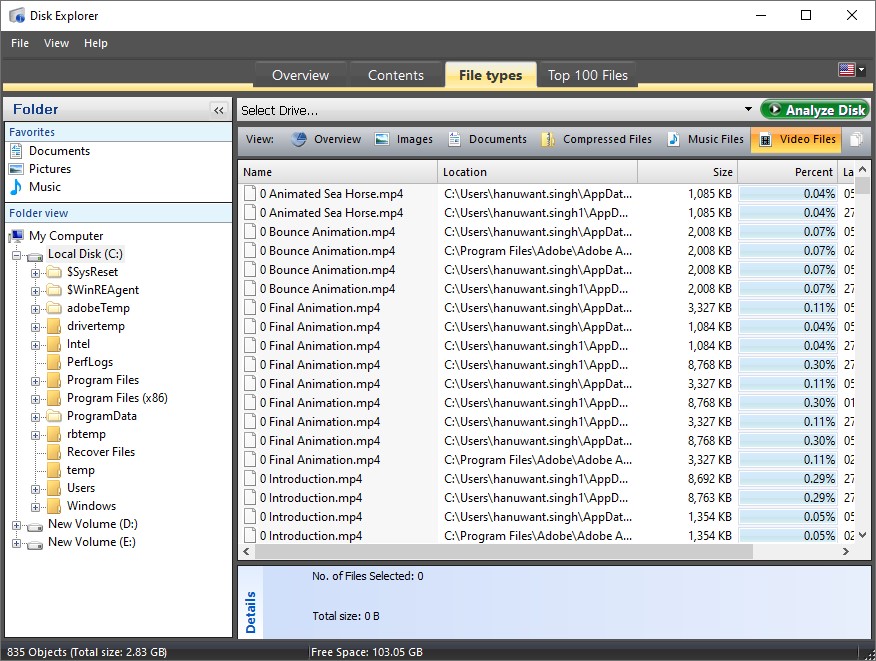
Top 100 Files - Sort the files by size and remove the unneeded ones using the options provided in the context menu.
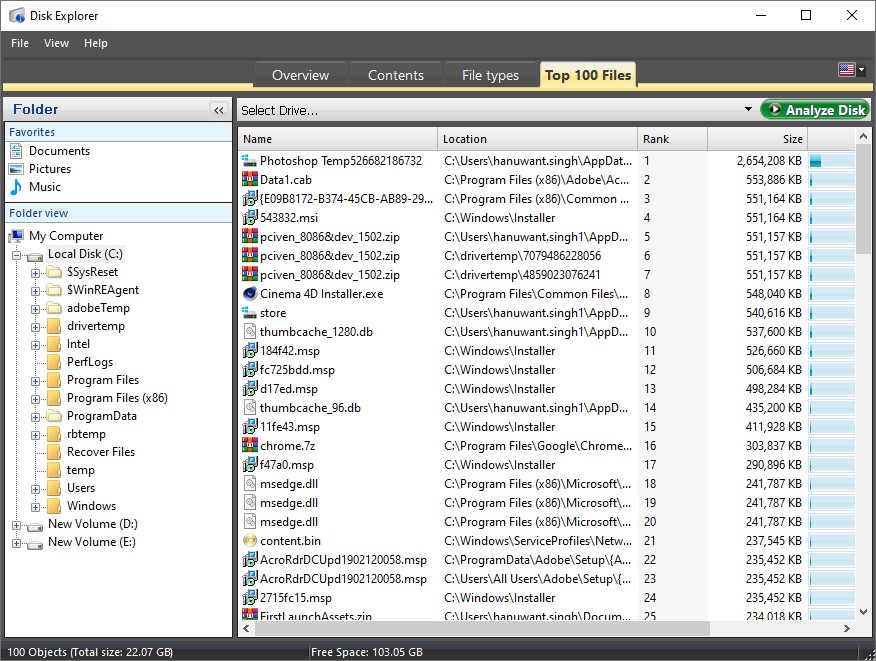
This helps clean cluttered data and remove unwanted files, freeing up disk space.
